Cross-Domain Settings
Use the cross-domain settings in AnyTrack to unify customer journeys that span across multiple domains.
Affiliate Marketers
There's no need to enable cross-domain tracking if your site features affiliate links directing users to external offers. Cross-domain tracking is for tracking users across your own websites.
What is Cross-Domain Tracking?
Cross-domain tracking enables you to monitor users as they navigate across multiple domains. This method ensures that users do not initiate a new session or create new first party data when navigating from one domain to another. With cross-domain tracking, the user is recognized as the same user across different sites, allowing for a continuous session. This continuity helps preserve campaign identifiers and other first-party data as the user transitions from one domain to another.
For example, if you operate both a shop and a blog on separate domains and use ads to drive traffic to the blog, you'd want visitors to the blog to be recognized as the same individuals when they move to the shop. This way, if they make a purchase in the shop, the conversion can be attributed to the ads that originally directed them to the blog. This ensures accurate tracking of ad effectiveness across different domains.
Adding an additional domain in Cross-Domain Settings.
Popular Cross-Domain Tracking Use Cases
- Cross-domain between a Blog and a Shopify store hosted on different domains.
- Cross-domain between a website and a cart system (for cart systems supported in the Integration Catalog, follow their corresponding setup guide and only use cross-domain settings if indicated).
- Cross-domain between two AnyTrack accounts.
- When you have multiple shops on different domains ex:
example.com,example.fr,example.co.uk - Promote your blog on any ad platforms and run campaigns promoting your shop independently.
- Build custom audiences on both properties, and according to any of the conversions or events received from your Shopify property.
Data Flow in Cross-Domain Tracking
The diagram illustrates how AnyTrack unifies the tracking data of a Facebook user who clicks an ad, arrives at a website on one domain, and then navigates to a shop on a different domain. If the user converts, AnyTrack informs Facebook about which ad promoting the blog is generating sales in the shop.
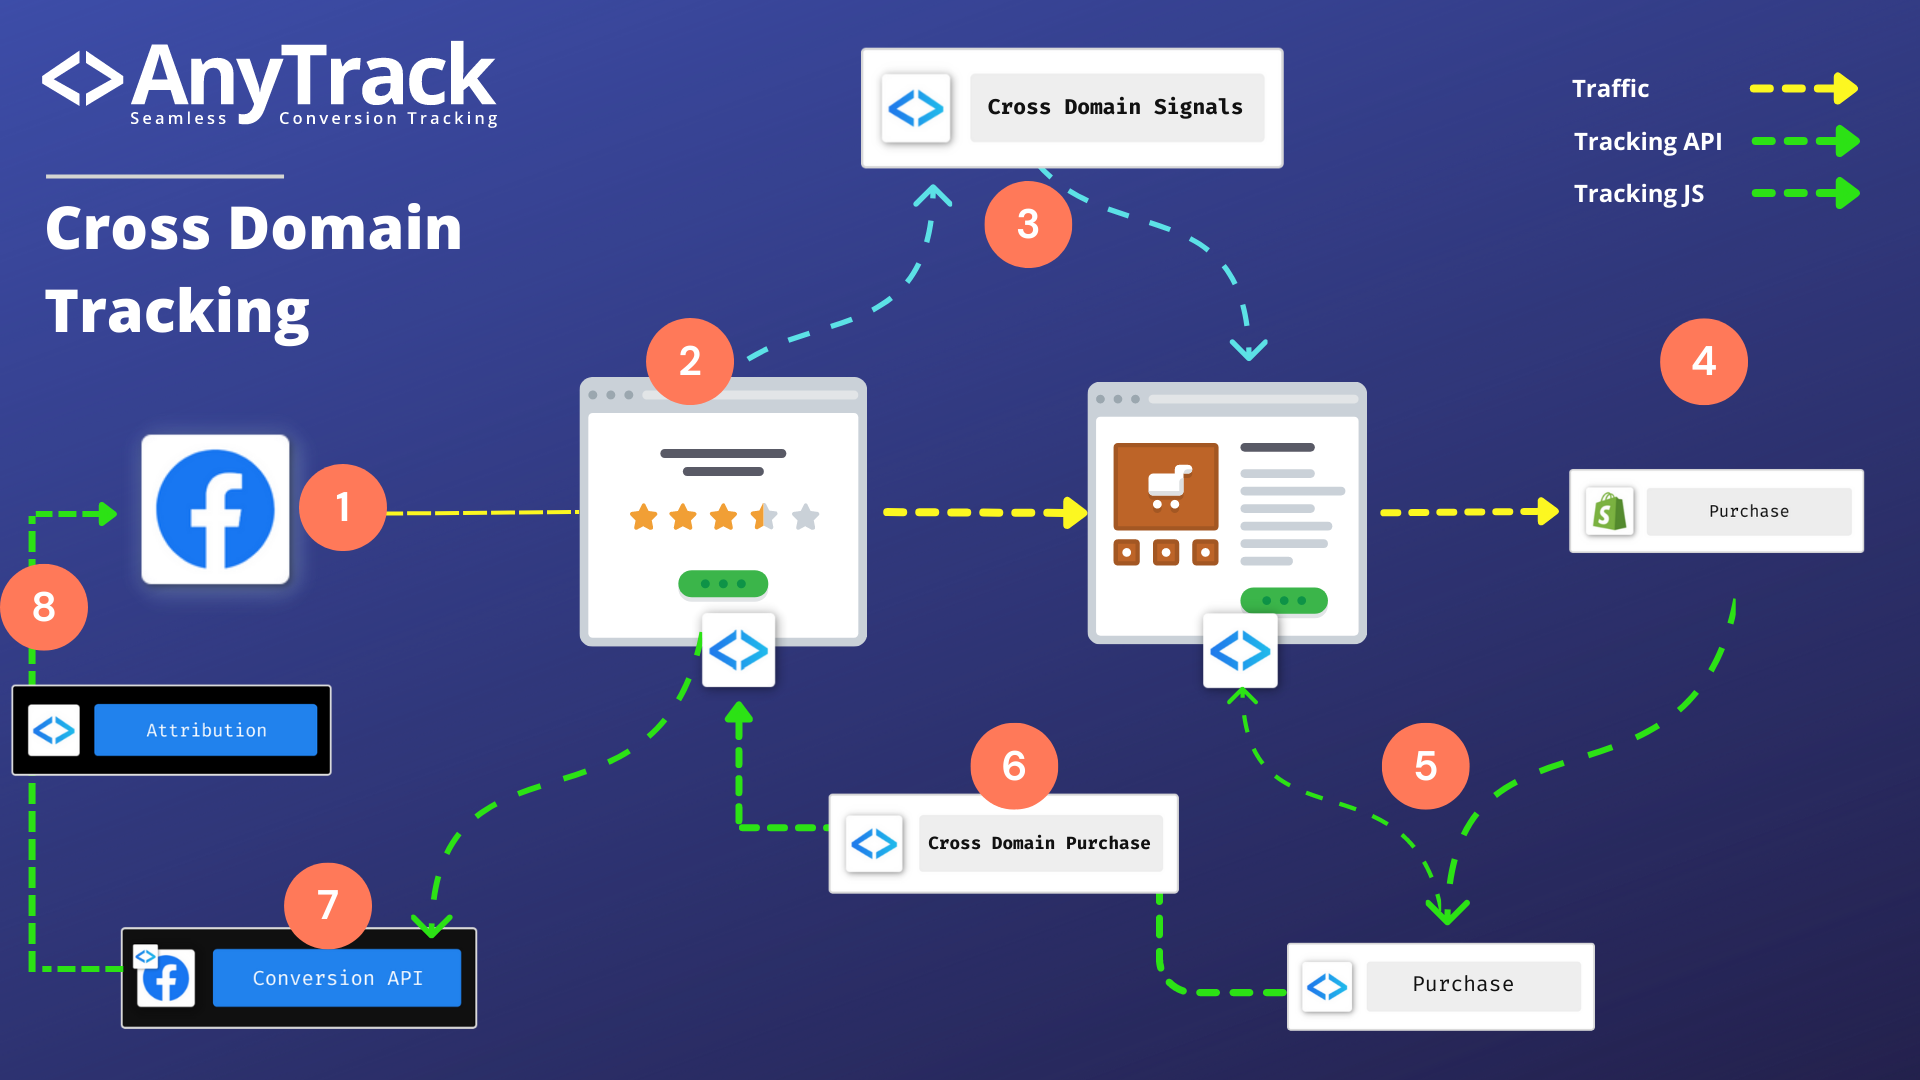
Cross-Domain tracking allows to unify the conversion data from multiple domains into one session.
- User clicks on a Facebook Ad and lands on your blog, located on domain A.
- AnyTrack sets and collects First Party Data (Facebook Cookie, GA Cookie) and traffic data (utm's).
- AnyTrack AutoTags the Product CTA with cross domain parameters.
- User clicks on the Product CTA and AnyTrack passes Cross Domain signals to the CTA url.
- User Lands on the Shop and purchases the product.
- Shopify Sends the Conversion Event Data to AnyTrack.
- AnyTrack Tracks the Conversion to the Shop Property.
- AnyTrack sends the Cross domain Purchase to the Blog property.
- AnyTrack sends the Purchase event to the Facebook Conversion API.
- Facebook applies attribution rules to the Purchase event and the conversion is reported in the Ads Manager.
Configuring Cross-Domain Settings
Different Properties, Different Settings
Each domain must be set as an independent property, with its own tracking tags, and pixel integrations. The cross-domain settings for these properties must be configured individually based on which one is the cross-domain property and the cross-domain destination.
Locate the Settings
On AnyTrack, navigate to Property Settings, select the property for which you want to set cross-domain, select the Settings tab, and scroll down to Client-Side Tracking Settings and select Cross-Domain Settings.
Available Settings
On the cross-domain tracking settings panel there is a field to enter the additional domains (A), the toggle to enable sync conversions (B) and the toggle for the AutoTag UTM parameters.
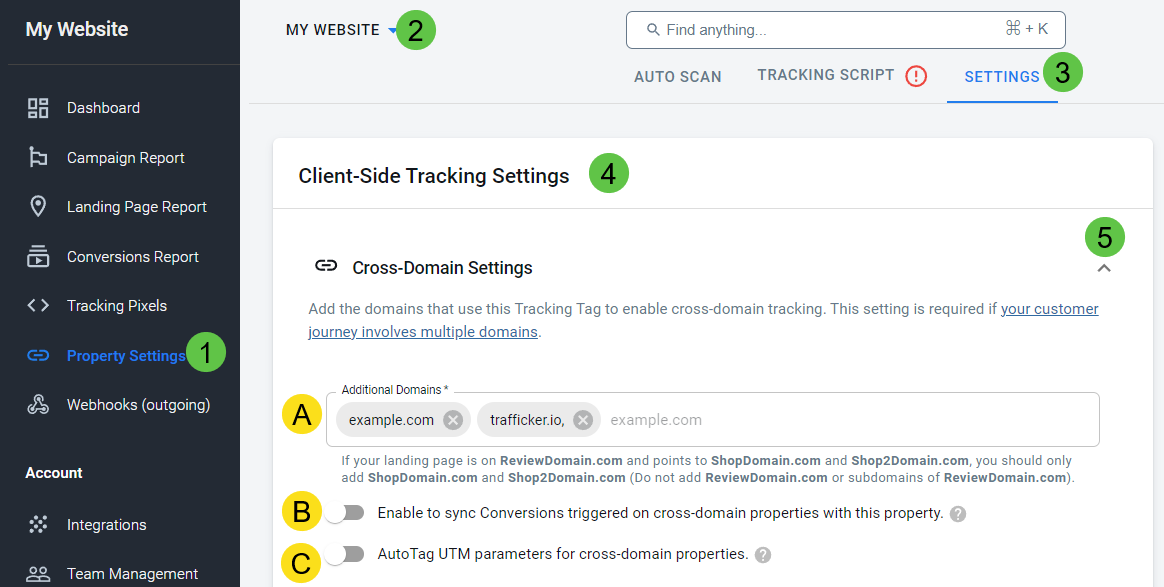
Find the Cross-domain settings on the Settings tab of the Property Settings section on AnyTrack.
Understand the Settings
Additional Domains field (A)
Configure this setting on the cross-domain property. Imagine you have a blog on website1.com and a shop on website2.com, and you have created a property for each of them in AnyTrack. Go to the cross-domains settings for website1.com and add website2.com to the Additional Domains field. AnyTrack will automatically append the atclid parameter to links leading to website2.com. Links on website1.com would look like this:
website2.com/?atclid=iVObG39NSjt34OZlBzUyeAxCJototuBn6u
Clicking these links transfers the session from website1.com to website2.com using the same Click ID, continuing the user's session without starting anew.
Sync Conversions Toggle (B)
Configure this setting on the cross-domain destination. This additional setting allows to sync conversions back to the cross-domain property. Enabling the conversion sync modifies the tag to use atrefid instead of atclid, linking any conversions on website2.com directly back to website1.com. This treats website2.com's conversions as if they occurred on website1.com. The links on website1.com will appear like this:
website2.com/?atrefid=iVObG39NSjt34OZlBzUyeAxCJototuBn6u
AutoTag UTM Parameters Toggle (C)
Configure this setting on the cross-domain property. Finally, activating the UTM parameter toggle appends the original UTM parameters to the URL, so that visitors arriving to website2.com will carry the identifiers of the campaign that initially brought them to website1.com. The links going to website2.com will appear like this:
website2.com/?atrefid=iVObG39NSjt34OZlBzUyeAxCJototuBn6u&utm_source={source}&utm_medium={medium}&utm_campaign={campaign}&utm_term={term}&utm_content={content}
This tracking approach ensures that your analytics capture the full journey and impact of cross-domain user activities and ad effectiveness.
Validating Cross-Domain Tracking
- Once you have configured and saved the changes for cross-domain tracking, open the cross-domain property website and hover on one of the links pointing to the cross-domain destination website. You should see a parameter
?atclid=or?atrefid=appended to your links. If you don't see it it, open a new browser window (incognito mode) or guest mode, and repeat step 1,2.
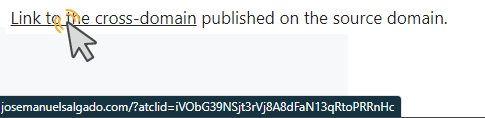
Links to the cross-domain destination will be auto-tagged with atclid.
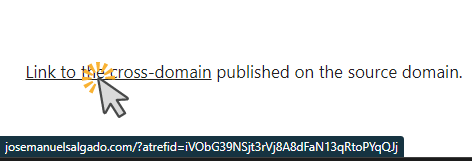
When Sync Conversions is On, links will be auto-tagged with the atrefid.
- Now click on the link and go through the funnel.
- Once you are done, you can open the conversion event page of the Cross Domain Property and check the conversions that were received from your shop.
- Additionally, AnyTrack AutoScan will also indicate links affected by cross-domain settings. The Tracking Group will indicate "crossdomain", (or "AnyTrack" if Sync Conversions is On.)
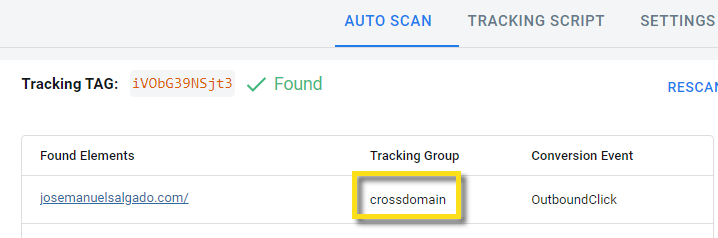
AutoScan shows which links are affected by cross-domain settings.
Validation in external tools:
- In Google Analytics, the real-time dashboard will show the conversions.
- In Facebook Event Manager, wait about 15-20 minutes to see your conversions.
- Add a webhook to the property and send the conversion to a Google Sheet or Airtable.
Cross-Domain Tracking in Cart Systems
Supported Cart Systems
For cart systems listed in the AnyTrack Integration Catalog, please refer to their respective setup guides. These guides indicate whether cross-domain tracking settings are necessary and how to implement them.
Imagine your online store operates on store.com, and the checkout process is handled on store.cart.com—a subdomain of a different domain, cart.com. You have implemented the same tracking tags, such as the Meta Pixel and Google Analytics Tag, on both the store and the cart system. When a user clicks the "Checkout" button on store.com to navigate to the checkout page on store.cart.com, several critical actions occur:
Without Cross-Domain Tracking
- New Session Starts: When a user moves from store.com to store.cart.com, a new session will start, with the source and medium set as store.com / referral.
- New Cookies Set: New cookies will be set in the user's browser specific to the new domain, losing the continuity of the session.
- Misattributed Conversion: The conversion, if it occurs, will be wrongly attributed to store.com / referral rather than the original traffic source, like an ad campaign.
With Cross-Domain Tracking
- Session Continuity: The session remains open and retains the source/medium that triggered the initial visit, such as a Facebook ad, ensuring continuity.
- Cookie Continuity: Cookie data will be passed along to the checkout page URL, maintaining the integrity of tracking data across the domains.
- Accurate Conversion Tracking: Google Analytics will record the conversion and attribute it to the correct initial session and user, ensuring accurate data.
- Correct Ad Attribution: If you're advertising on platforms like Google or Facebook Ads, the conversion will be correctly attributed to the ad that initially brought the user to your store, enhancing the effectiveness of your ad spend.
Configure Cross-Domain Tracking Between AnyTrack Accounts
You can also use cross-domain tracking when the cross-domain property and the cross-domain destination are on different AnyTrack accounts. This is useful, for example, if you partner with another AnyTrack user: one has a shop, and the other has a website that promotes the shop.
This is achieved by setting up an outbound webhook in the account with the cross-domain property, and setting up the AnyTrack Multiaccount Integration in the account with the cross-domain destination to receive those webhooks.
Setup Guide
-
On the AnyTrack account with the cross-domain destination, install the AnyTrack MultiAccount Integration from the Integration Catalog and copy its postback URL.
Install the AnyTrack integration on the account with the cross-domain destination.
-
On the AnyTrack account with the cross-domain property, install an Outbound Webhook pointing to the postback URL from Step 1. Include all the conversion events you want to sync.
Use an Outbound Webhook to send the events to the cross-domain destination.
-
On the cross-domain settings for the cross-domain property, add the domain of the cross-domain destination and save your changes.
Frequently Asked Questions
-
No. Just add the root domain and Anytrack will take care of the rest.Do I need to add the subdomain of the cross domain property? -
No. It will generate self referral traffic which will corrupt your tracking.Do I need to add the domain of the initial domain in the cross domain settings? -
Yes, but you'll need a way to get conversions to sync with your account.Can I add a domain that I don't own on the cross domain settings? -
No. Thrivecart has its own integration settings that you should follow and which covers the cross domain tracking requirements.Shall I add the domain of a platform integrated in AnyTrack (example: Thrivecart)? -
No. Currently the UTM parameters are set by default.Can I modify the UTM parameters sent to the referred property? -
Yes, but it's not recommended as it will generate self referral for the cross domain property.Can I setup cross domain tracking on the same property?
Updated 23 days ago