
Track Conversions with Zapier
Learn how to track conversions on AnyTrack.io using Zapier webhooks. Step-by-step guide to integrate and optimize conversion tracking. Boost your campaign insights and ROI.
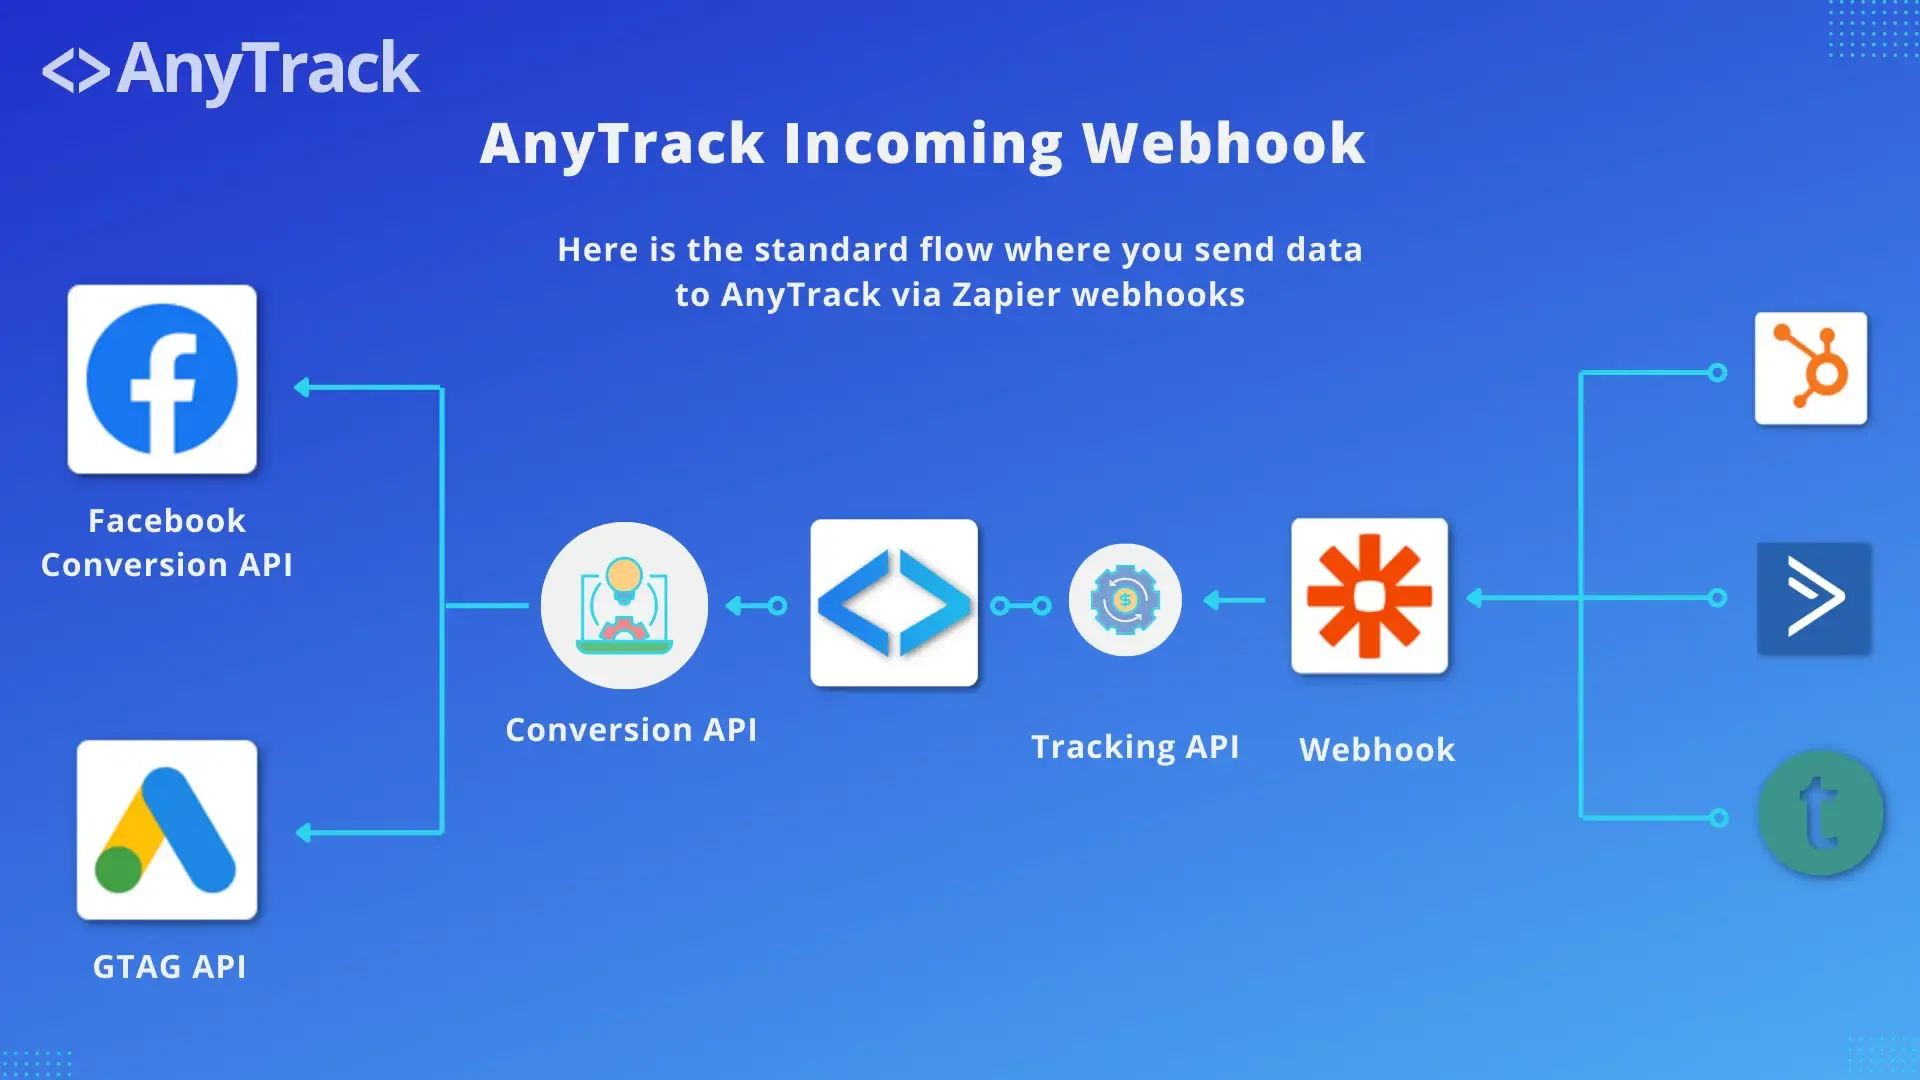
Zapier webhooks connect AnyTrack with your favorite apps. This guide walks you through setting up Zapier webhooks to enable server-side tracking without complex integration work. Achieve precise and reliable conversion tracking.
The Click ID: Key to Conversion Tracking
Section titled “The Click ID: Key to Conversion Tracking”The AnyTrack Click ID is the unique identifier that connects your website, app, and AnyTrack. This guide shows how to use Zapier to send conversions to AnyTrack with the crucial Click ID.
This guide is for integrations not natively integrated with AnyTrack. Check the Integration Catalog to see if your app is already integrated or request a new one if needed.
Step 1: Configure Your App to Store the Click ID
Section titled “Step 1: Configure Your App to Store the Click ID”-
Create a custom field in your app to pass tracking data:
- Field Name:
atclid,click_id, orclickid - Field Default value:
--CLICK-ID-- - Field label:
click_id,clickid, oratclid - Field value type:
textorstring - Field display:
hidden - Field required: Not required (if browser blocks JS, AnyTrack cannot pass the
clickidvalue)
- Field Name:
-
Update your form to add the custom field so the AnyTrack click ID passes during submission
-
Include Click ID in Webhook Data - normally sent automatically to the webhook URL, but verify it is actually sent
Note: Not all form providers support hidden fields or collect tracking parameters. Verify with your provider.
Step 2: Create a Conversion Source in AnyTrack
Section titled “Step 2: Create a Conversion Source in AnyTrack”- Log into your AnyTrack dashboard
- Create a Conversion Source and select Custom
- Get the Postback URL (receives data from Zapier including Click ID)
Step 3: Configure Zapier to Send Data to AnyTrack
Section titled “Step 3: Configure Zapier to Send Data to AnyTrack”- Log into your Zapier account
- Create a new Zap
- Choose the Trigger App (select your app if integrated with Zapier or use Webhook)
- Set up the trigger by selecting the event that triggers the Zap
- Choose the action app as Webhooks POST
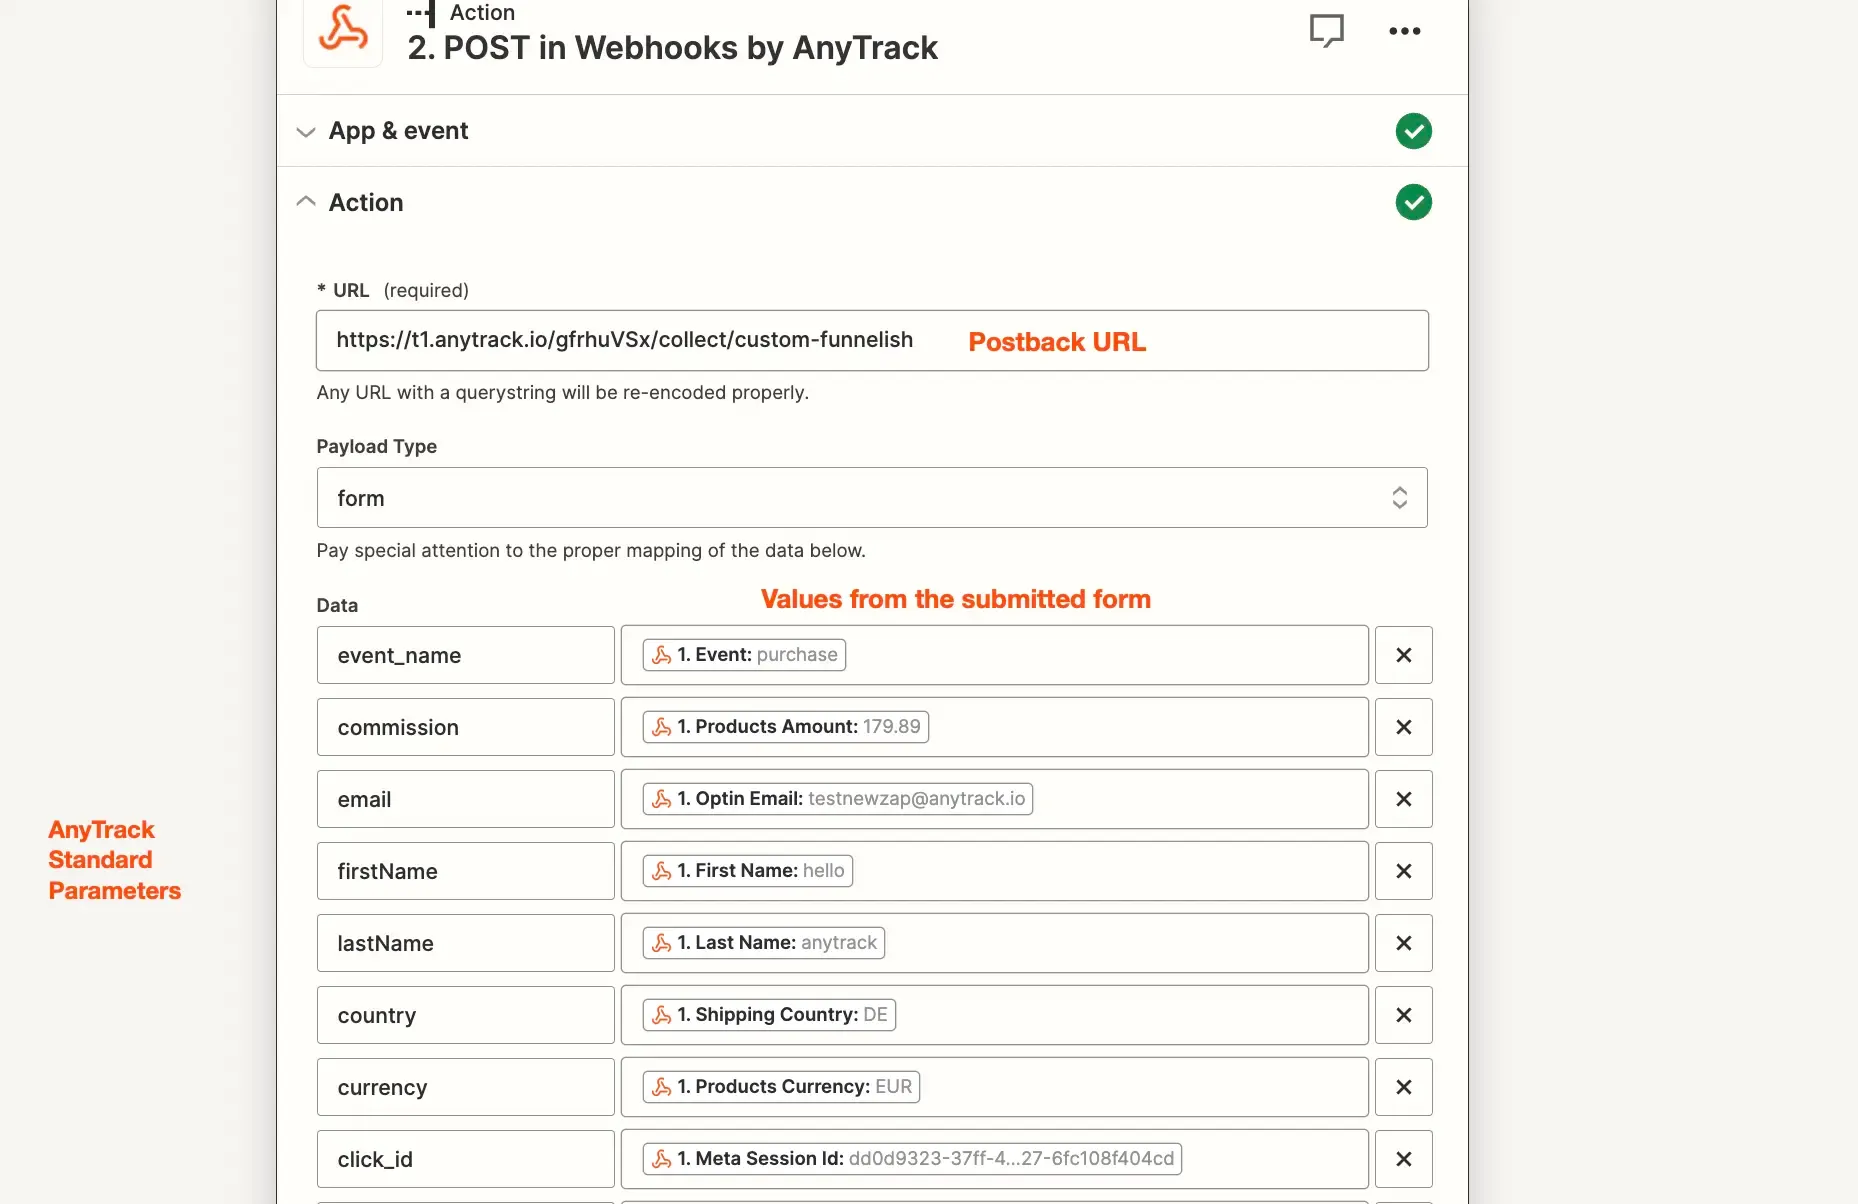
- Paste the Postback URL while removing query parameters including the question mark
Pro tips:
- Use Branch & Conditions to send conversions to AnyTrack based on trigger data (e.g., if Event name = Form Submitted, send
LeadEvent to AnyTrack) - Enrich Conversion Data with as many Event Attributes as possible to improve attribution and match rate
- Map the AnyTrack parameters to values collected through the Zap trigger
Note: The mapping example shows standard Event Attributes. Your values depend on data collected from your form.
- Test the Zap by going through your funnel from a fresh browser window
- Inspect the integration’s Events Log in AnyTrack to verify conversion data
- Activate the Zap to start sending conversions to AnyTrack
Conclusion
Section titled “Conclusion”The AnyTrack Click ID unlocks precision in conversion tracking. Guide conversions from your website through Zapier to AnyTrack with pinpoint accuracy.
When conversions are tracked, they are automatically sent to your ad platform’s Conversion API in real time.
Related Resources
Section titled “Related Resources”Frequently Asked Questions
FAQ was last reviewed on 2026-07-30
The Click ID is not recorded during the form submission.
click_id with an external id generated by your app.