Google Tag Manager
Learn how to install AnyTrack via the official Google Tag Manager Template, and how to trigger AnyTrack events through your existing GTM triggers for eCommerce platforms not natively integrated with AnyTrack.
Google Tag Manager (GTM) is a tag management system that lets you deploy and manage tracking tags on your website from an easy-to-use web-based interface.
You can install AnyTrack via the official Google Tag Manager Template available in the Google Tag Manager Template Gallery.
How AnyTrack Compares to Google Tag Manager
Section titled “How AnyTrack Compares to Google Tag Manager”If you’re currently using Google Tag Manager, you know that you need to configure various triggers that will fire your tags according to the events you want to track.
Depending on the complexity of your setup, these triggers can be hard to configure.
With AnyTrack, event tracking functions such as outbound clicks and form submissions are automatically triggered and the variables associated with these events are automatically collected and sent to the AnyTrack servers.
Install AnyTrack GTM Template
Section titled “Install AnyTrack GTM Template”Follow the step-by-step guide to install the AnyTrack GTM Template.
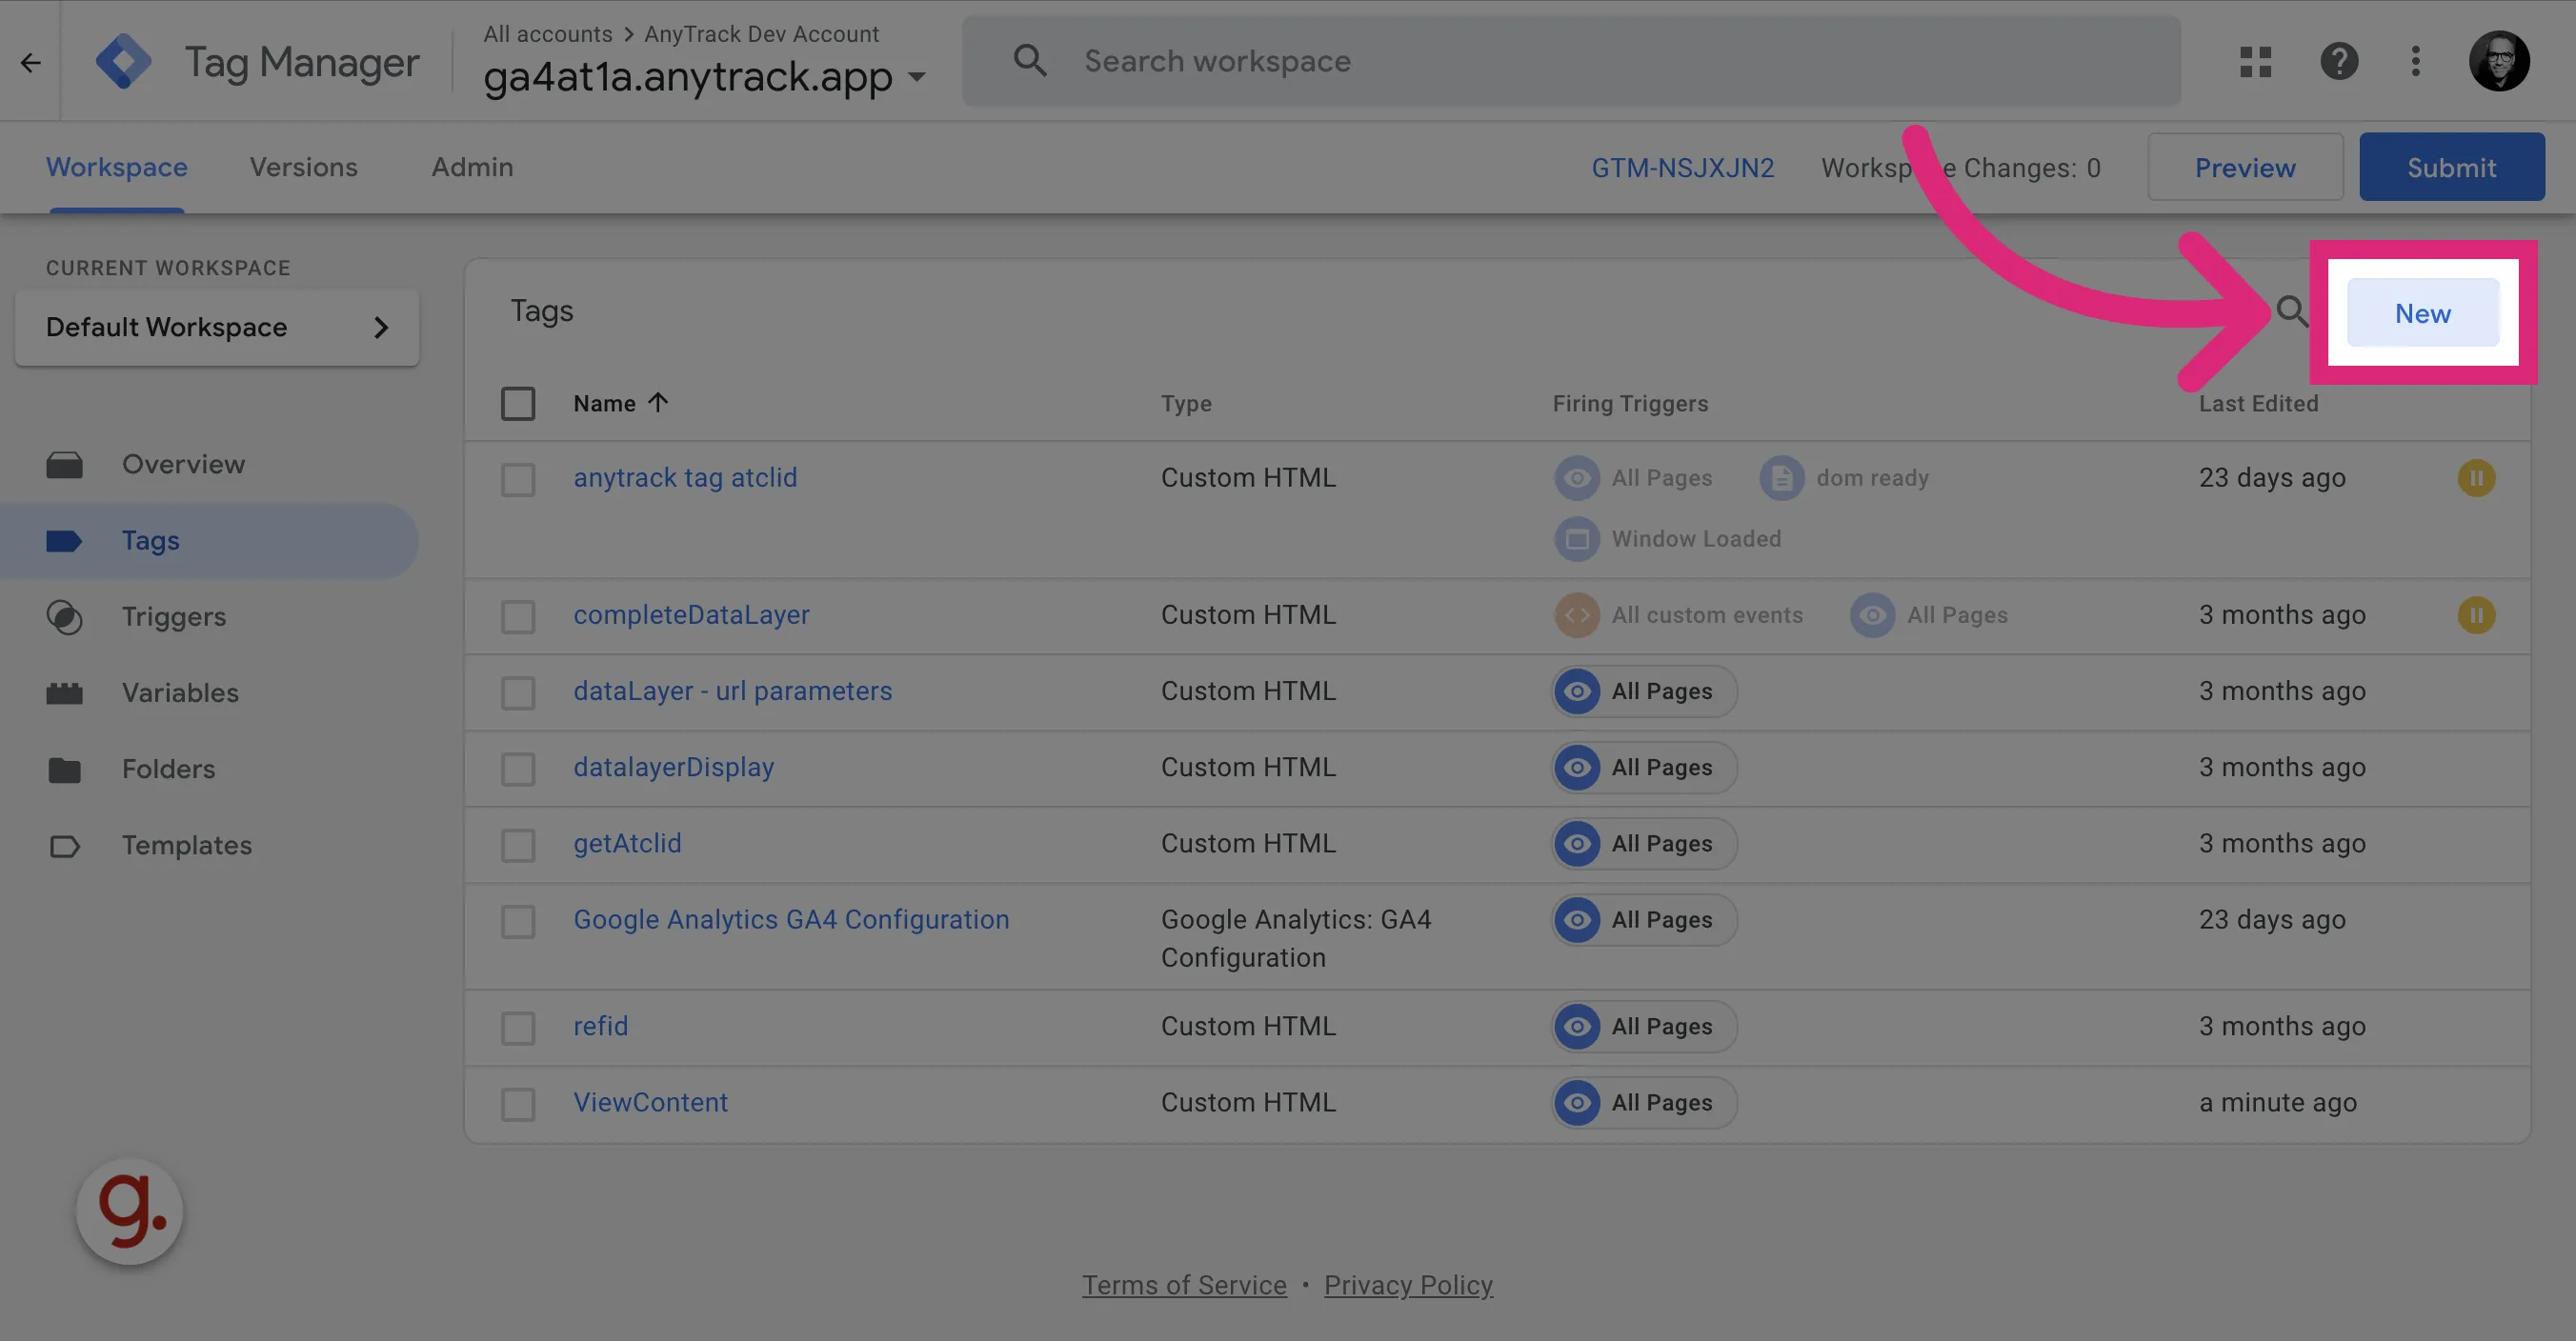
-
Click on the “New” button to add tag
Section titled “Click on the “New” button to add tag”
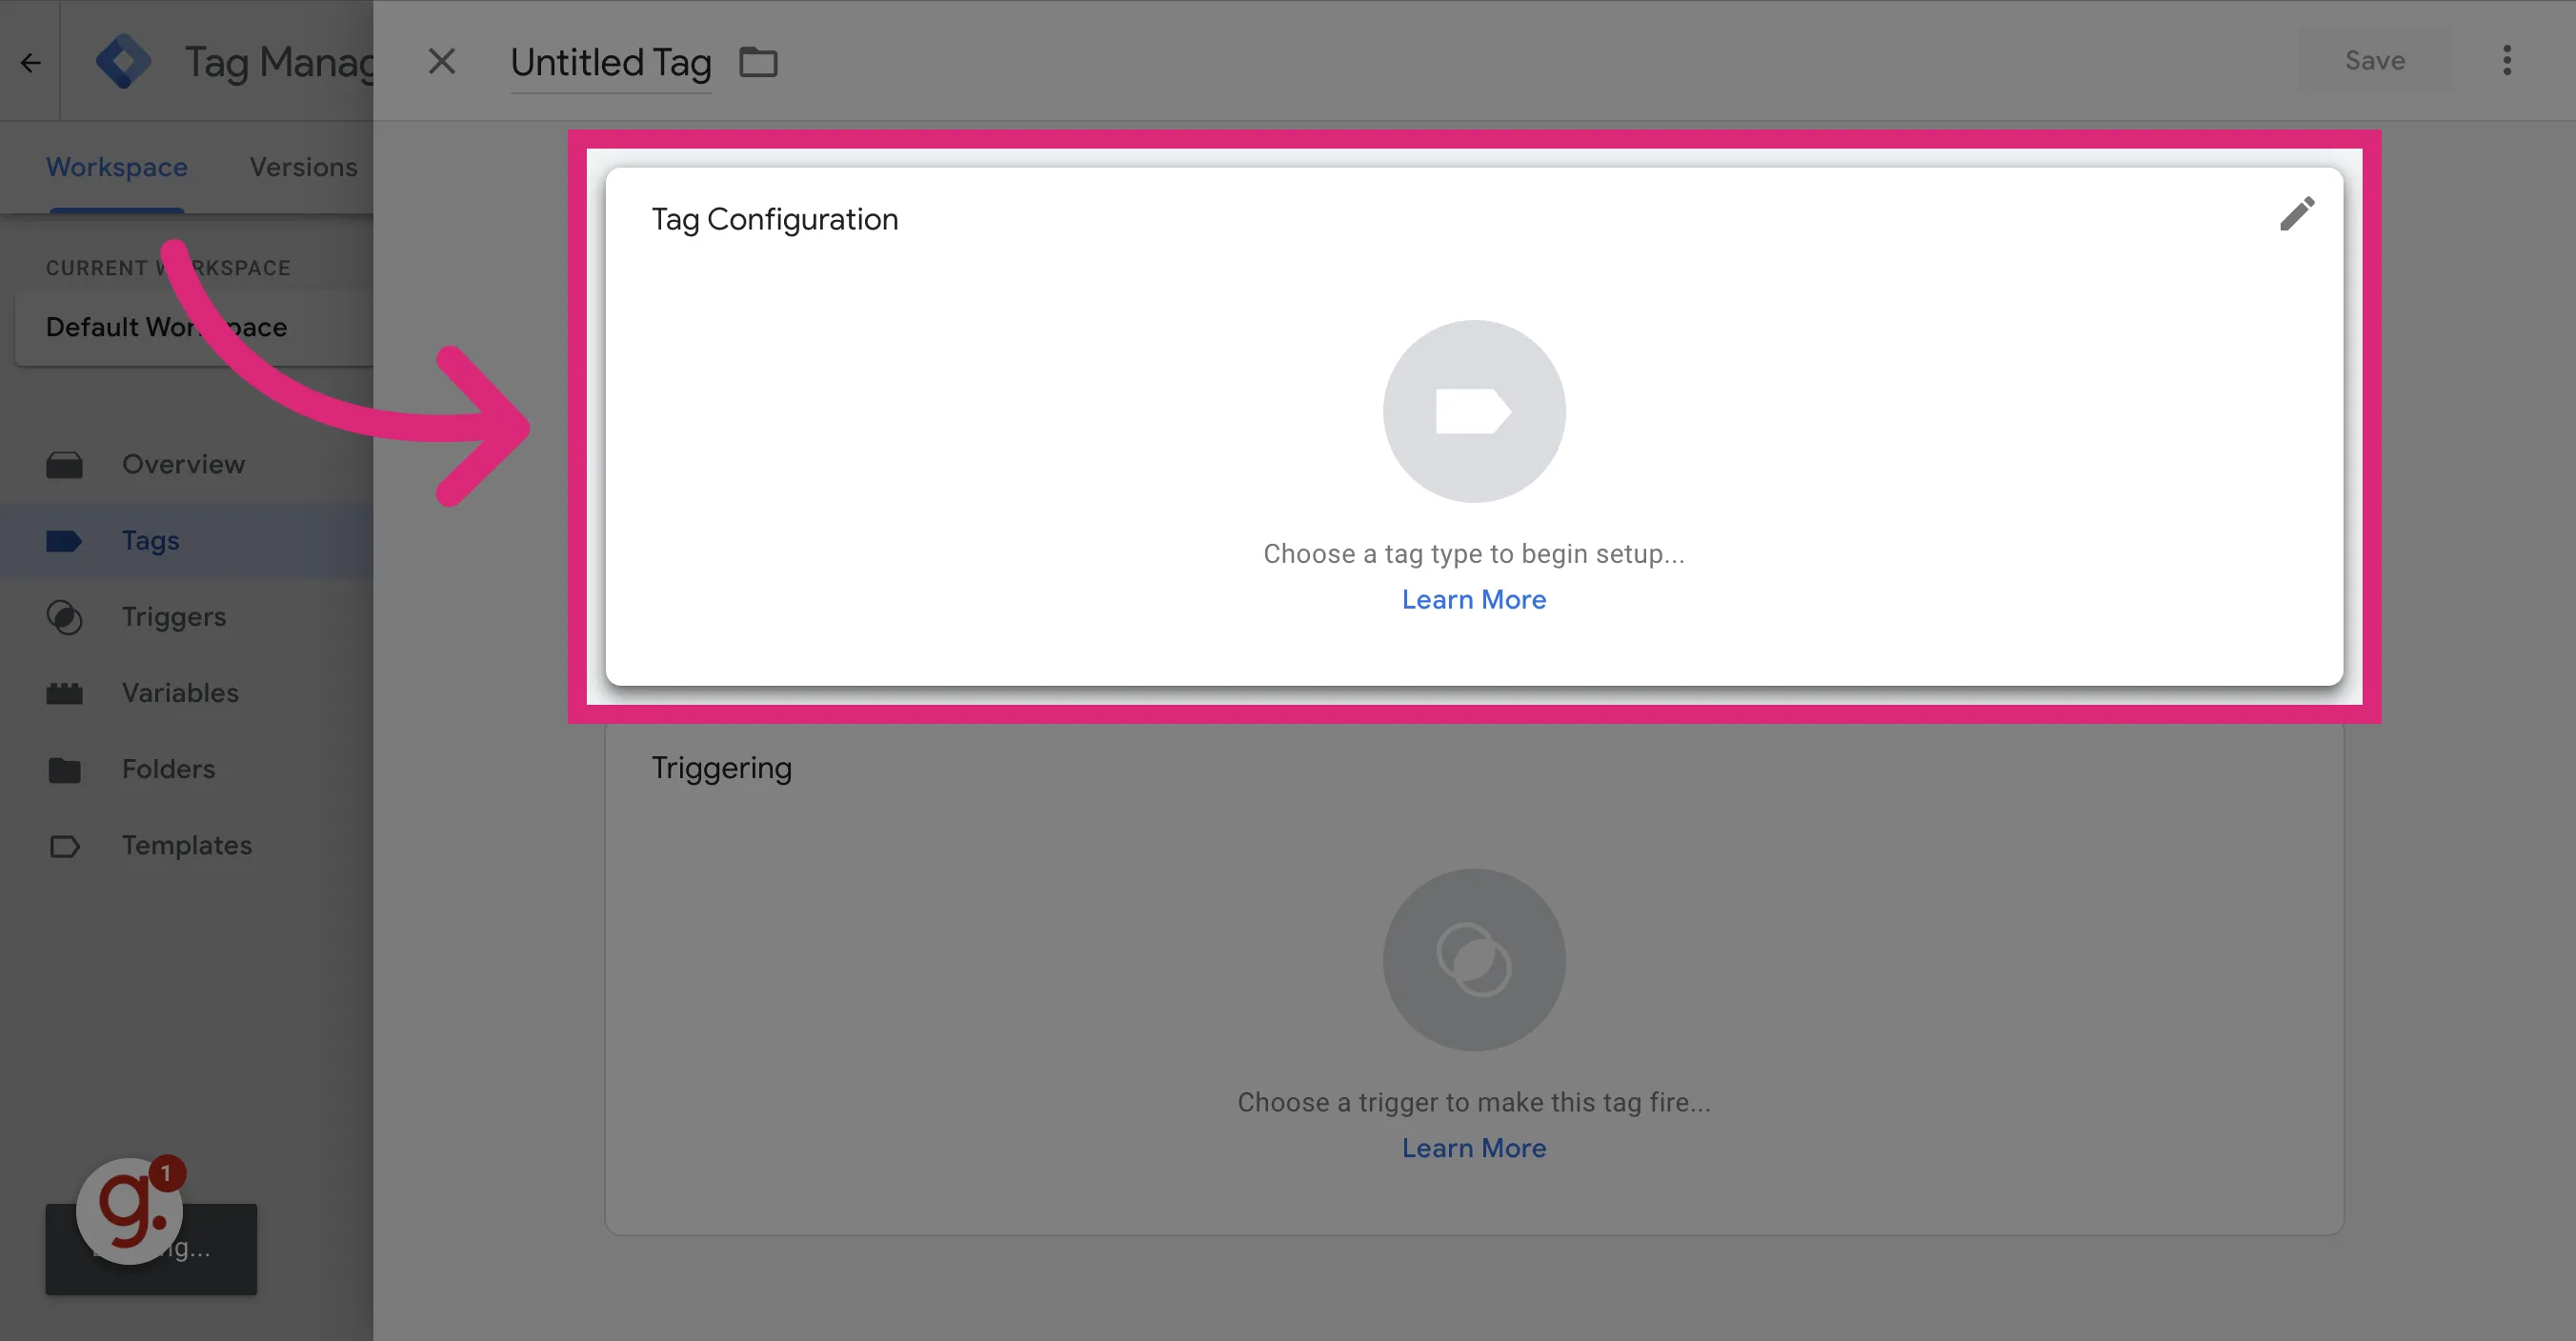
-
Click on the TAG icon to select a Tag
Section titled “Click on the TAG icon to select a Tag”
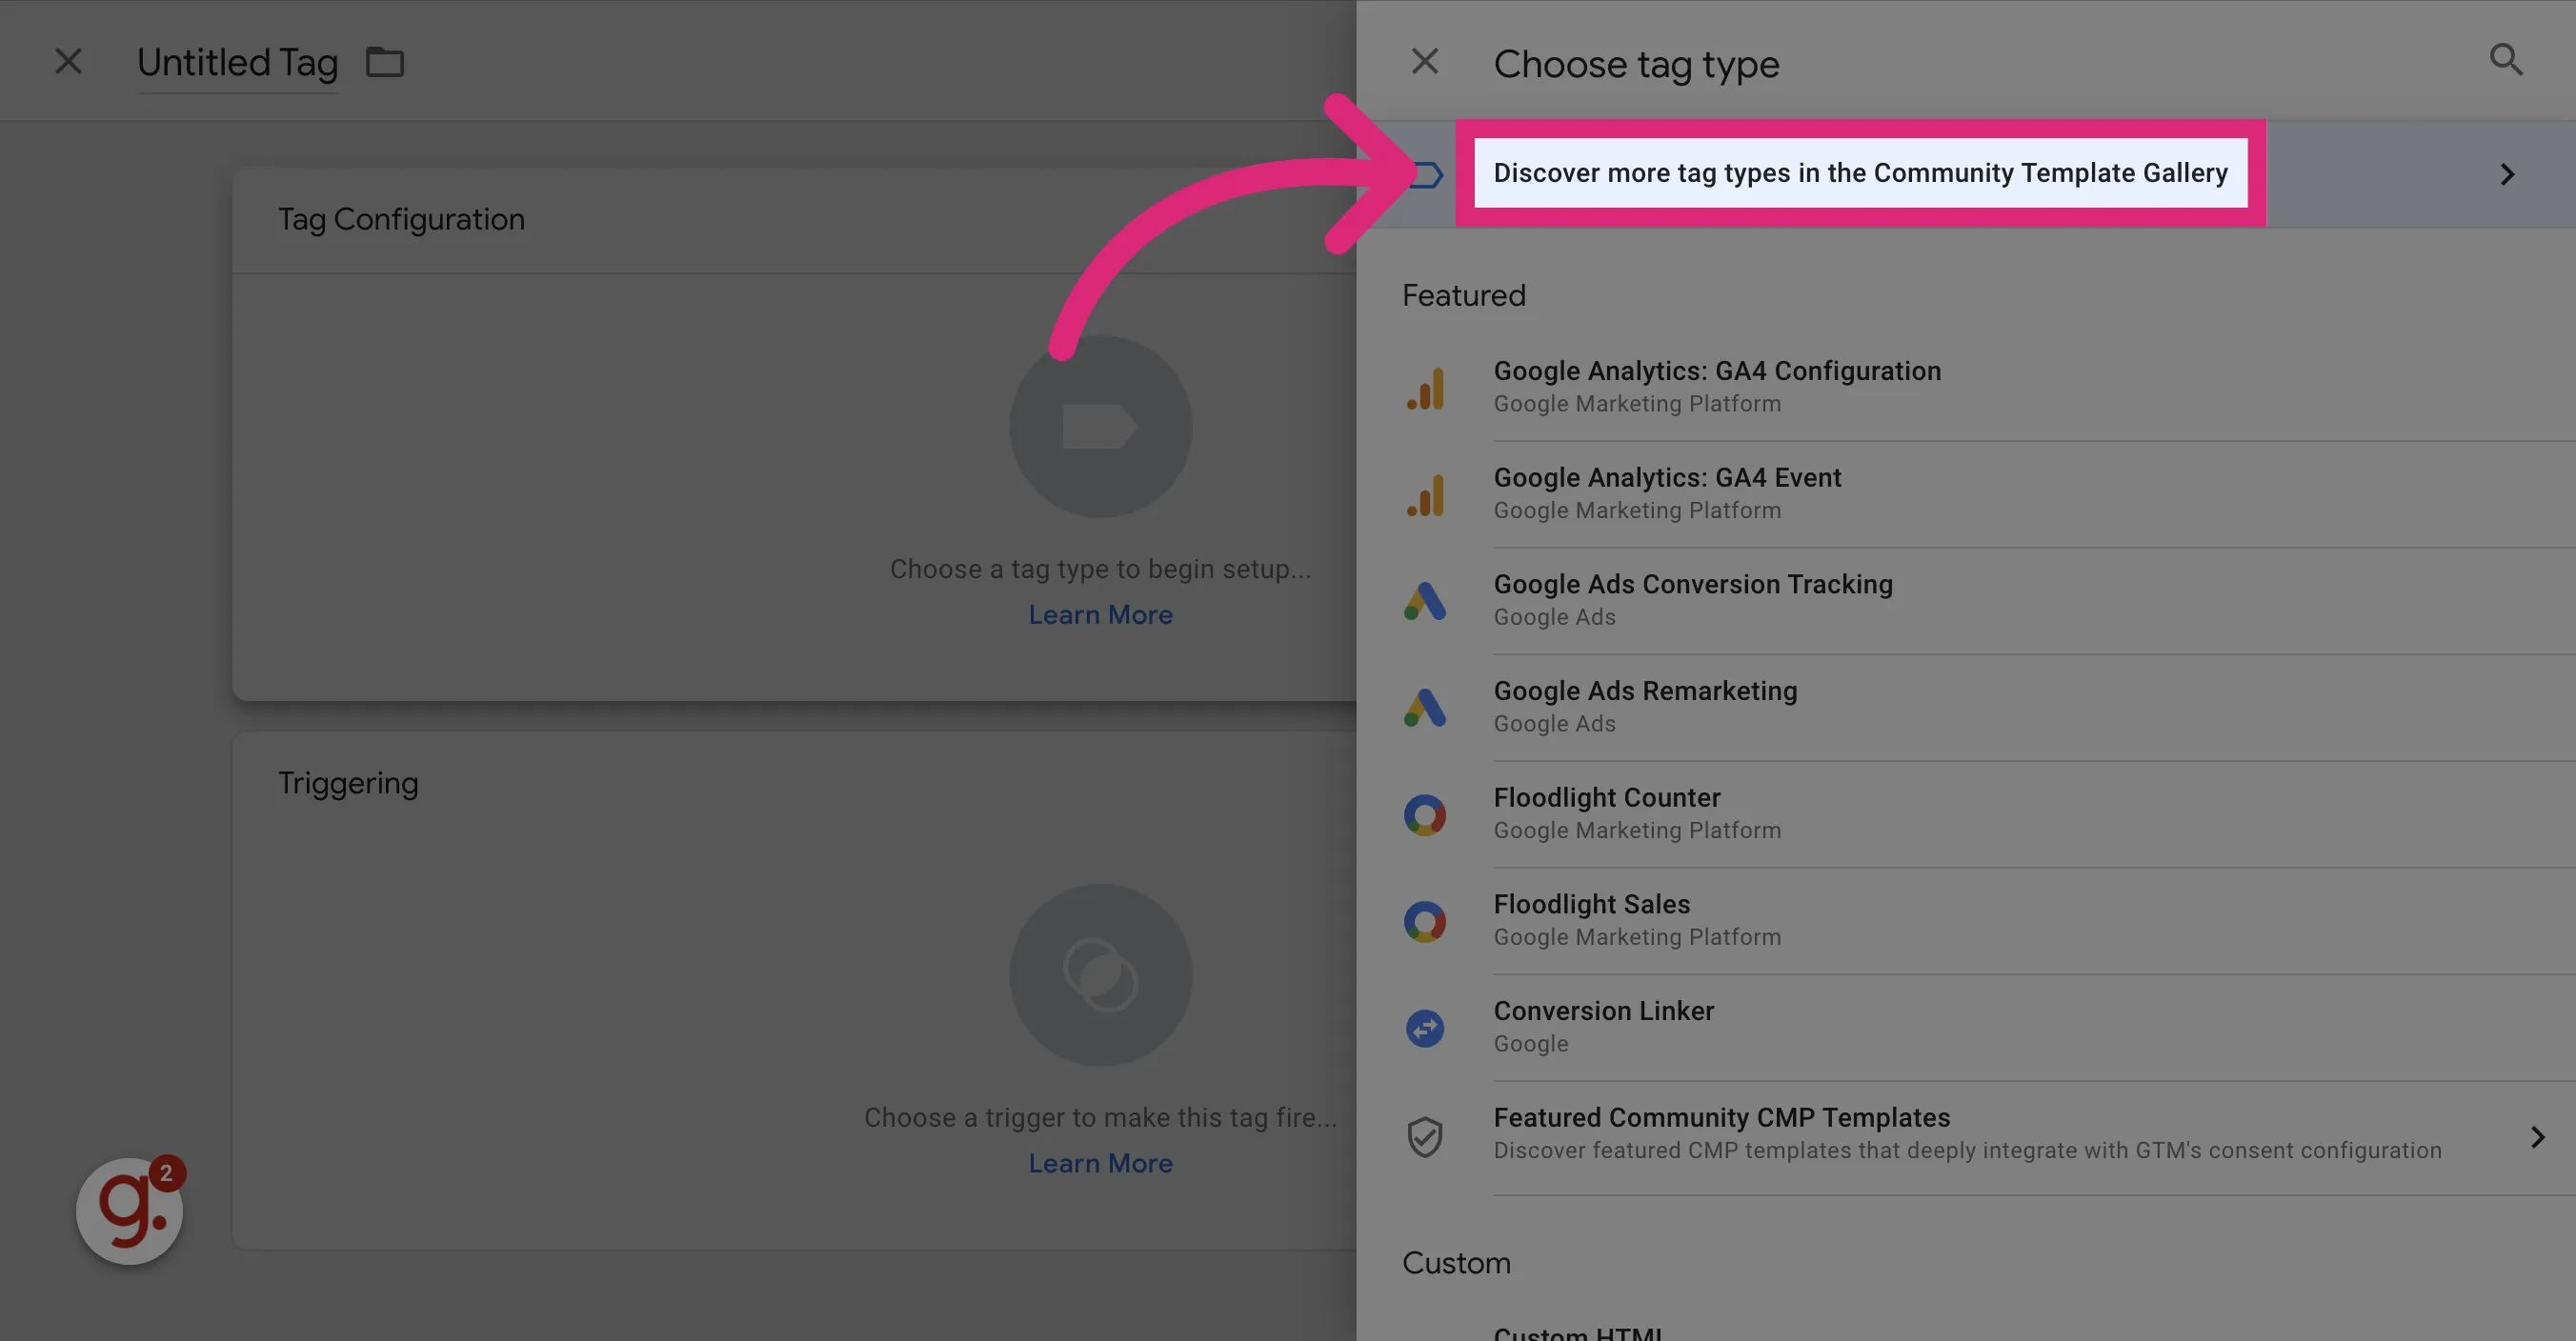
-
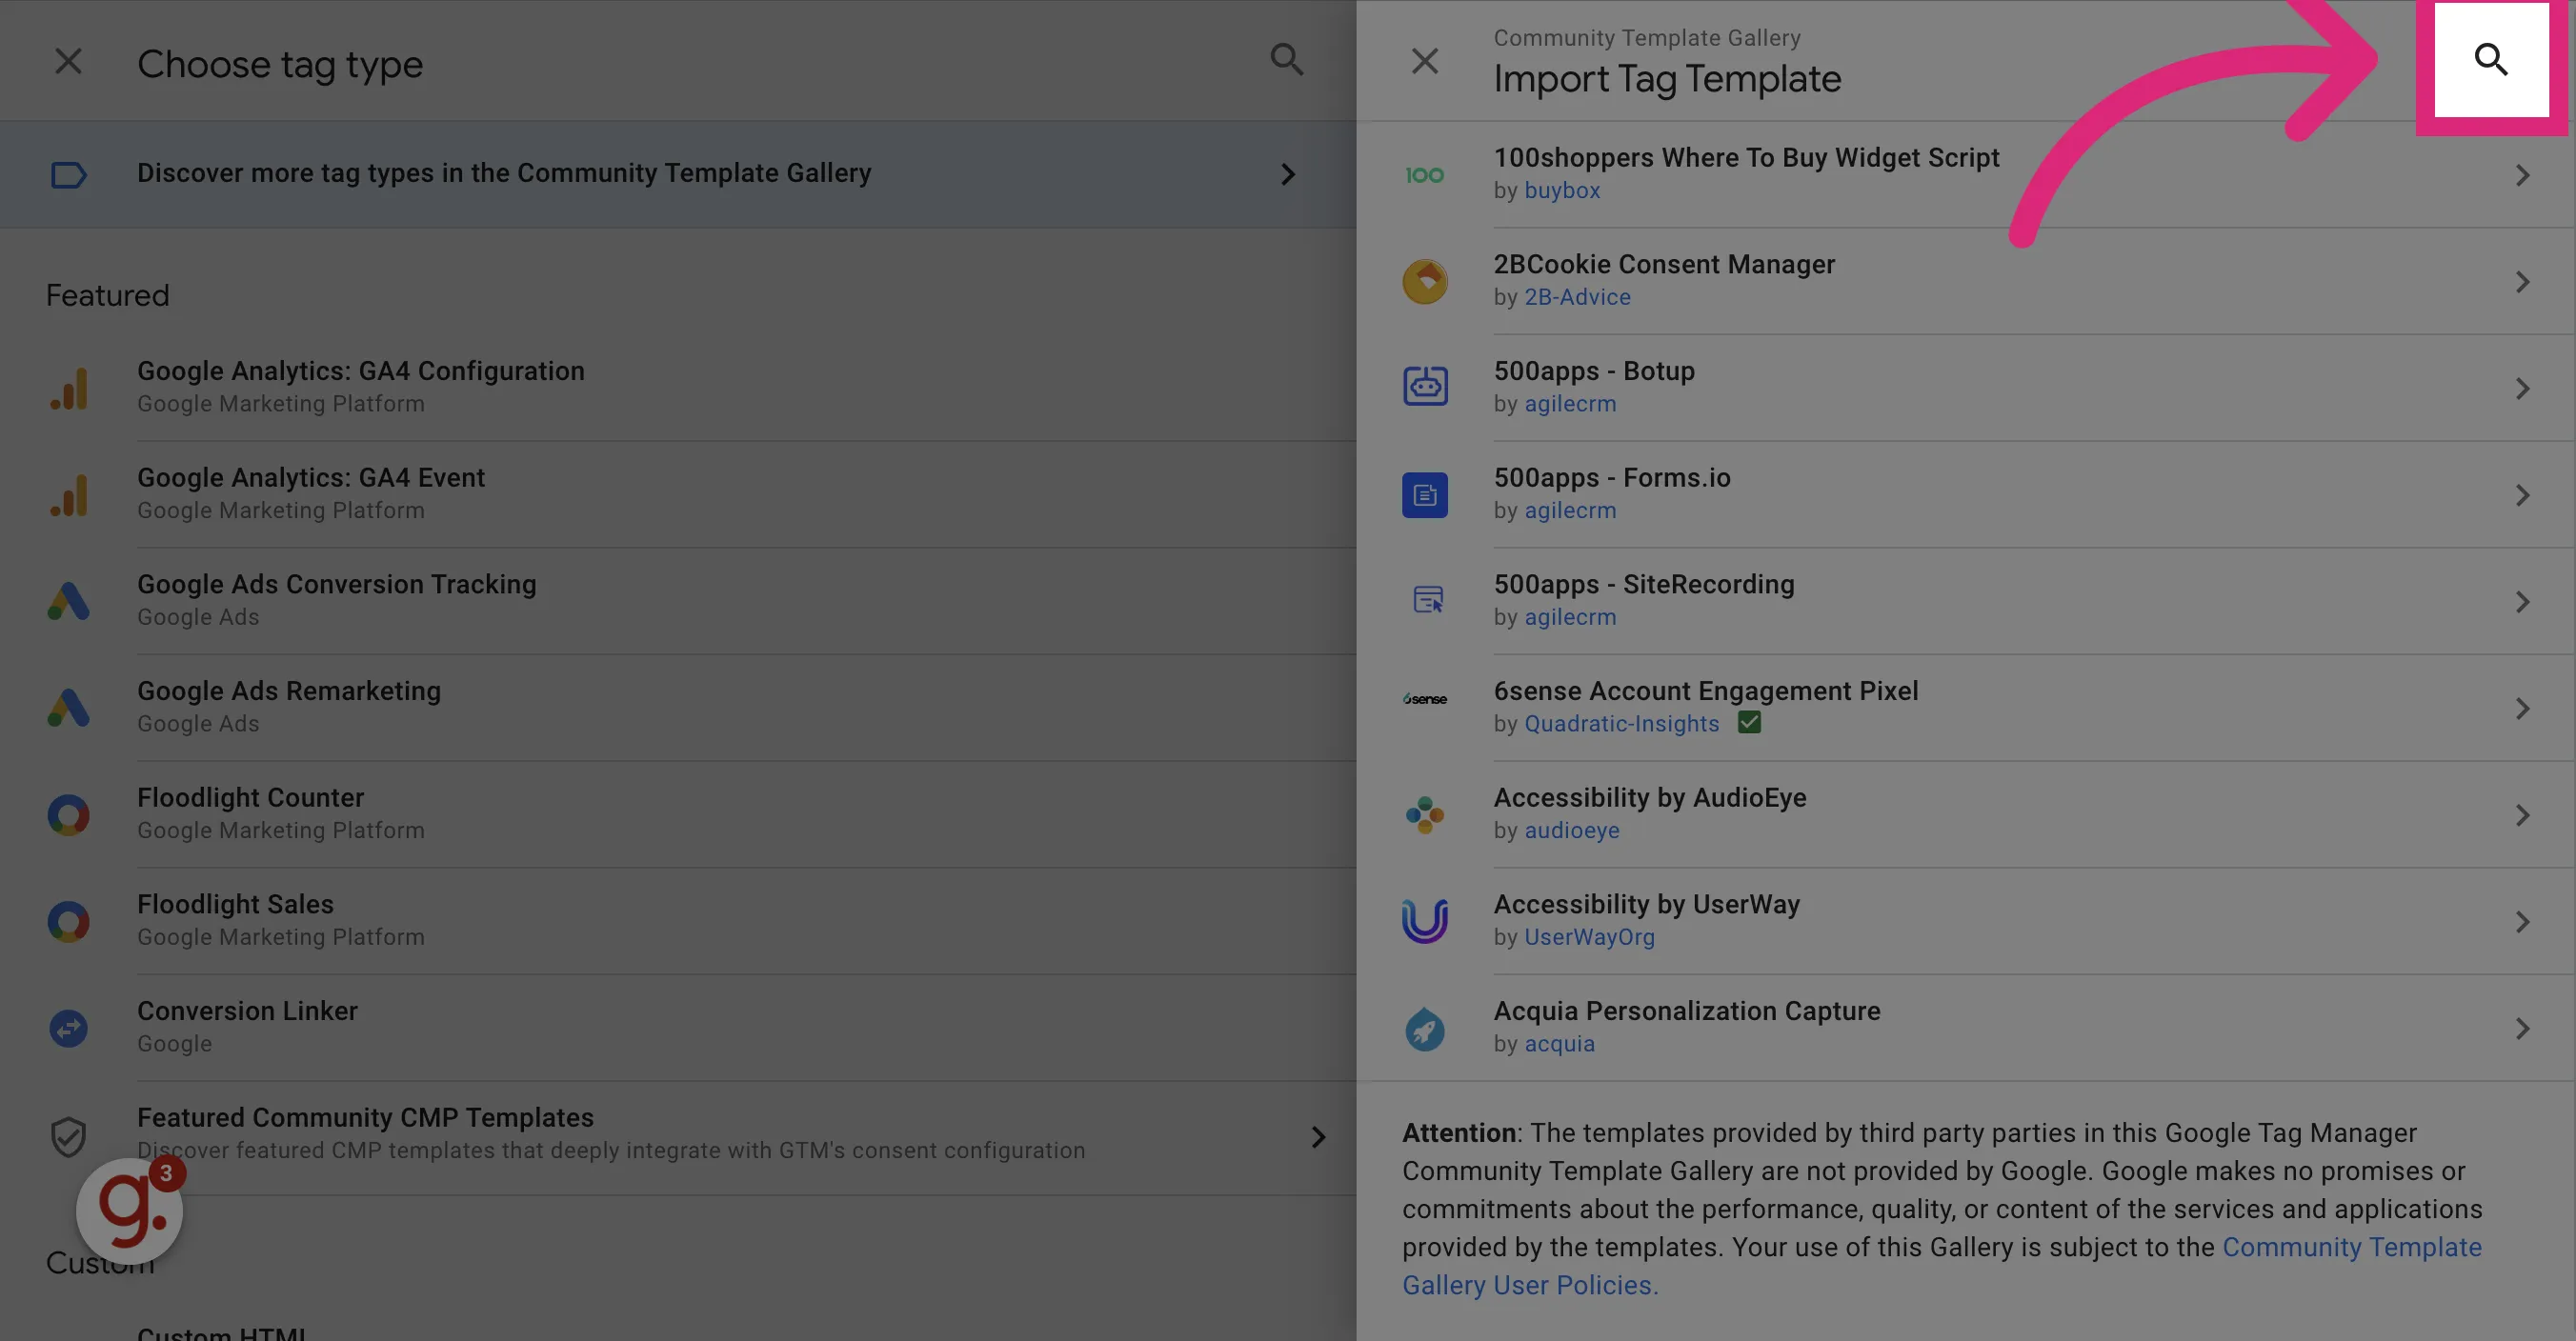
Click on the Community Template Gallery option
Section titled “Click on the Community Template Gallery option”
-
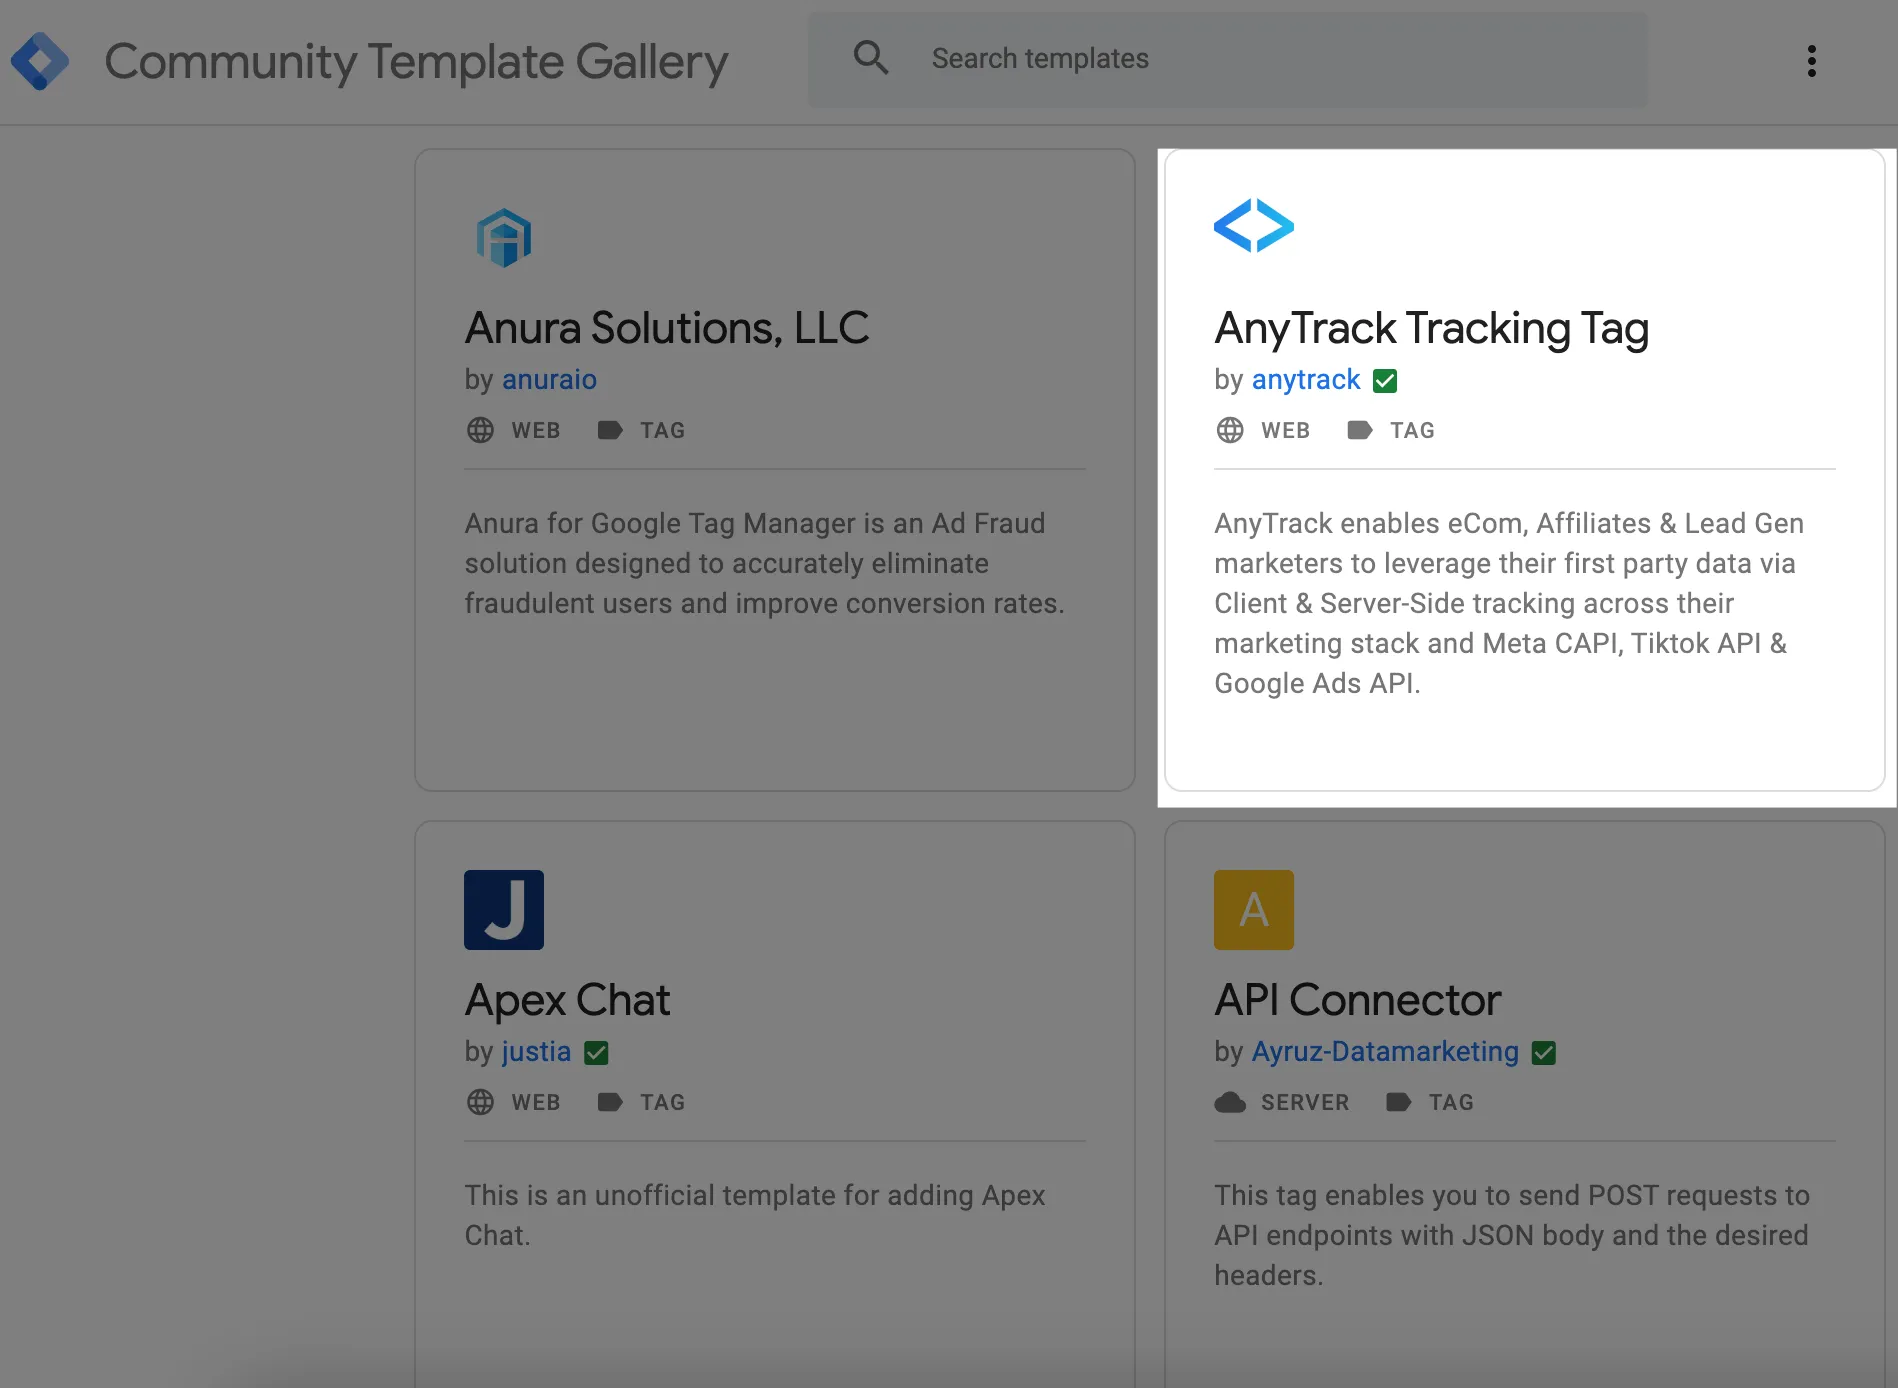
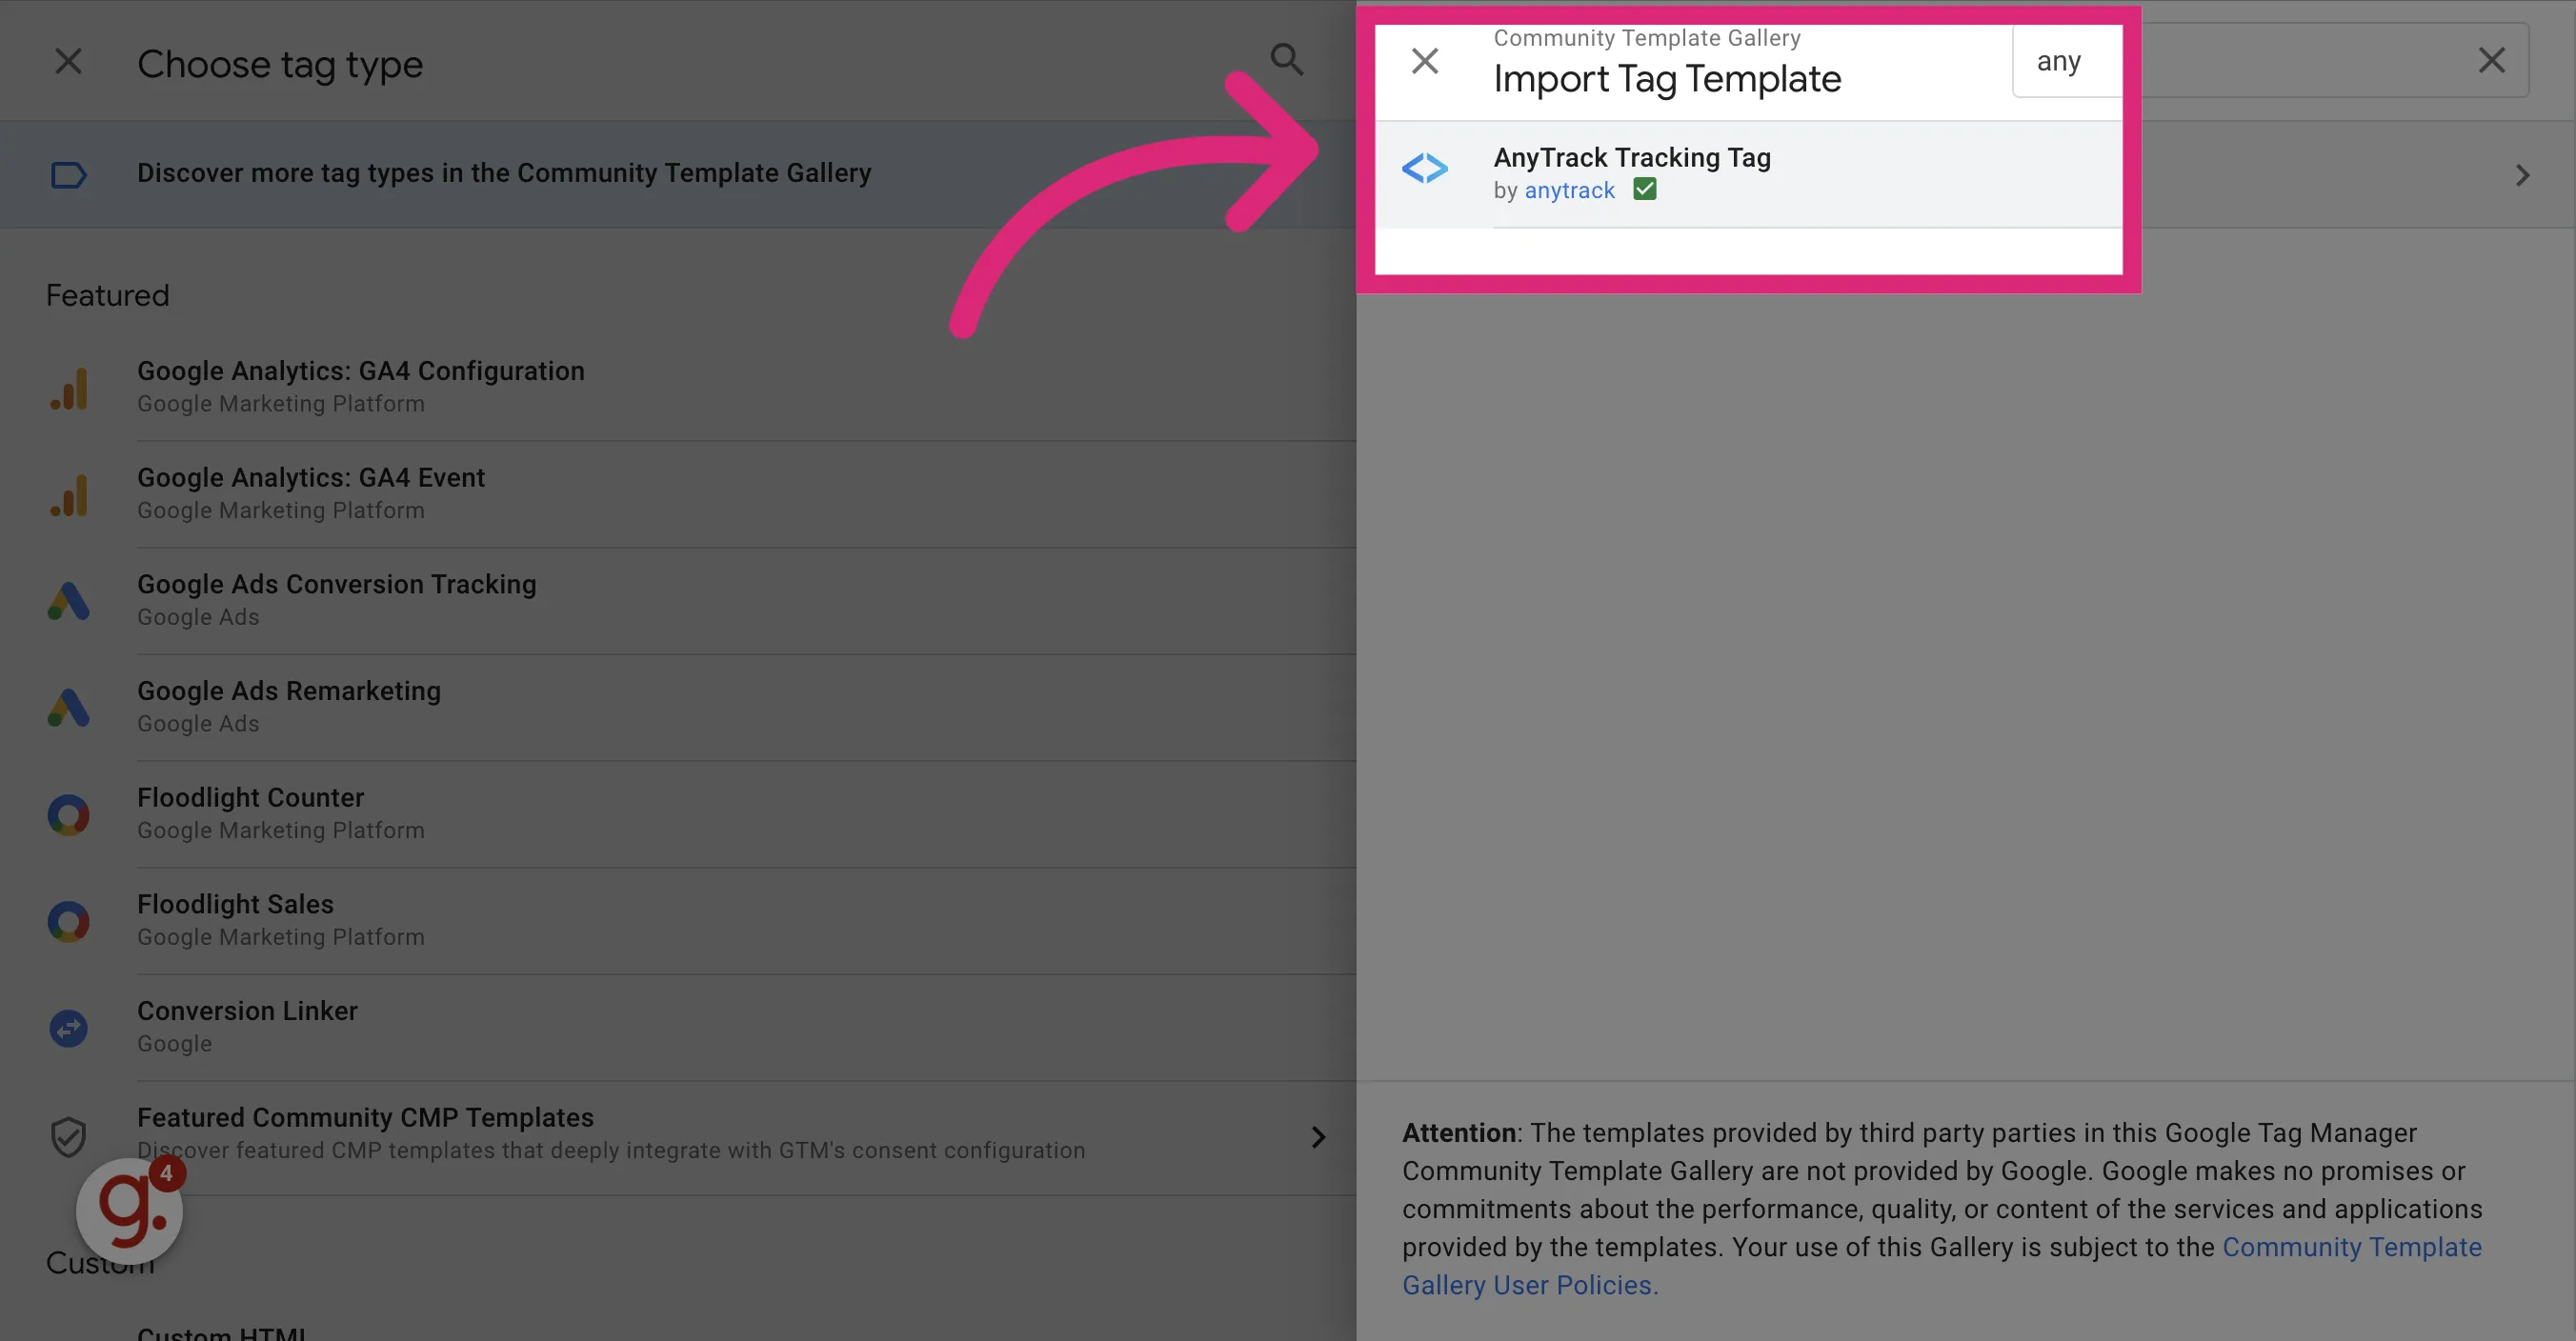
Search for the AnyTrack Template
Section titled “Search for the AnyTrack Template”
-
Select the “AnyTrack Tracking Tag”
Section titled “Select the “AnyTrack Tracking Tag””
-
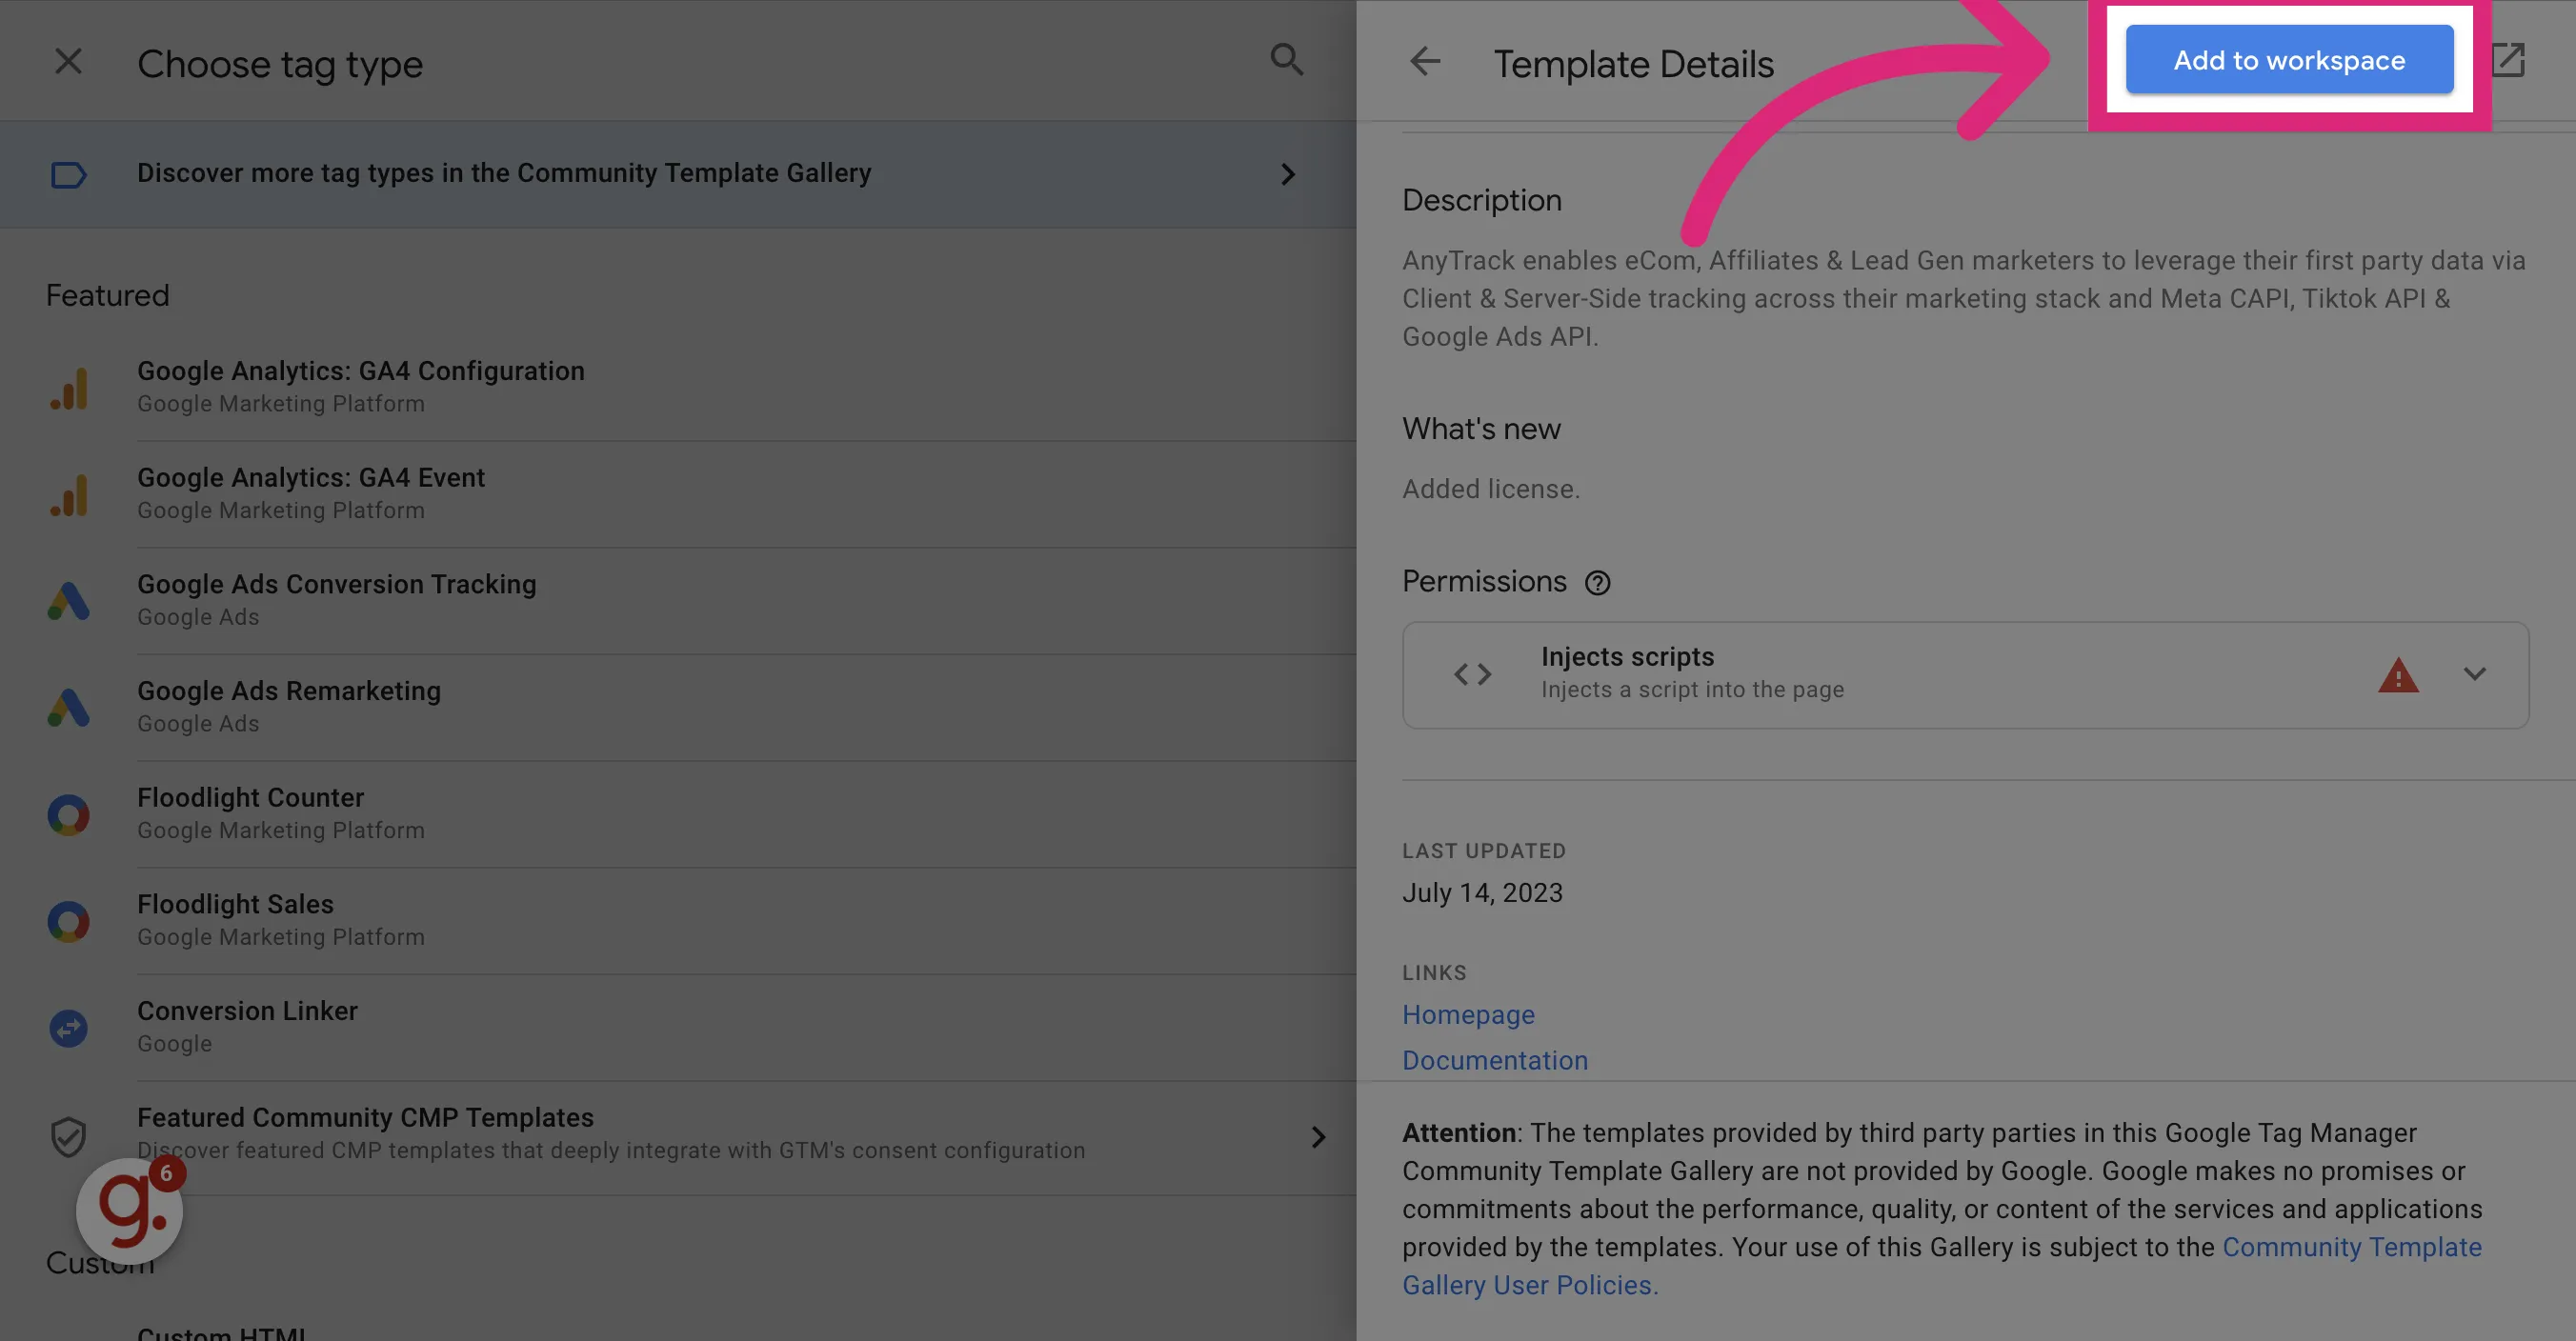
Click on the “Add to workspace” button.
Section titled “Click on the “Add to workspace” button.”
-
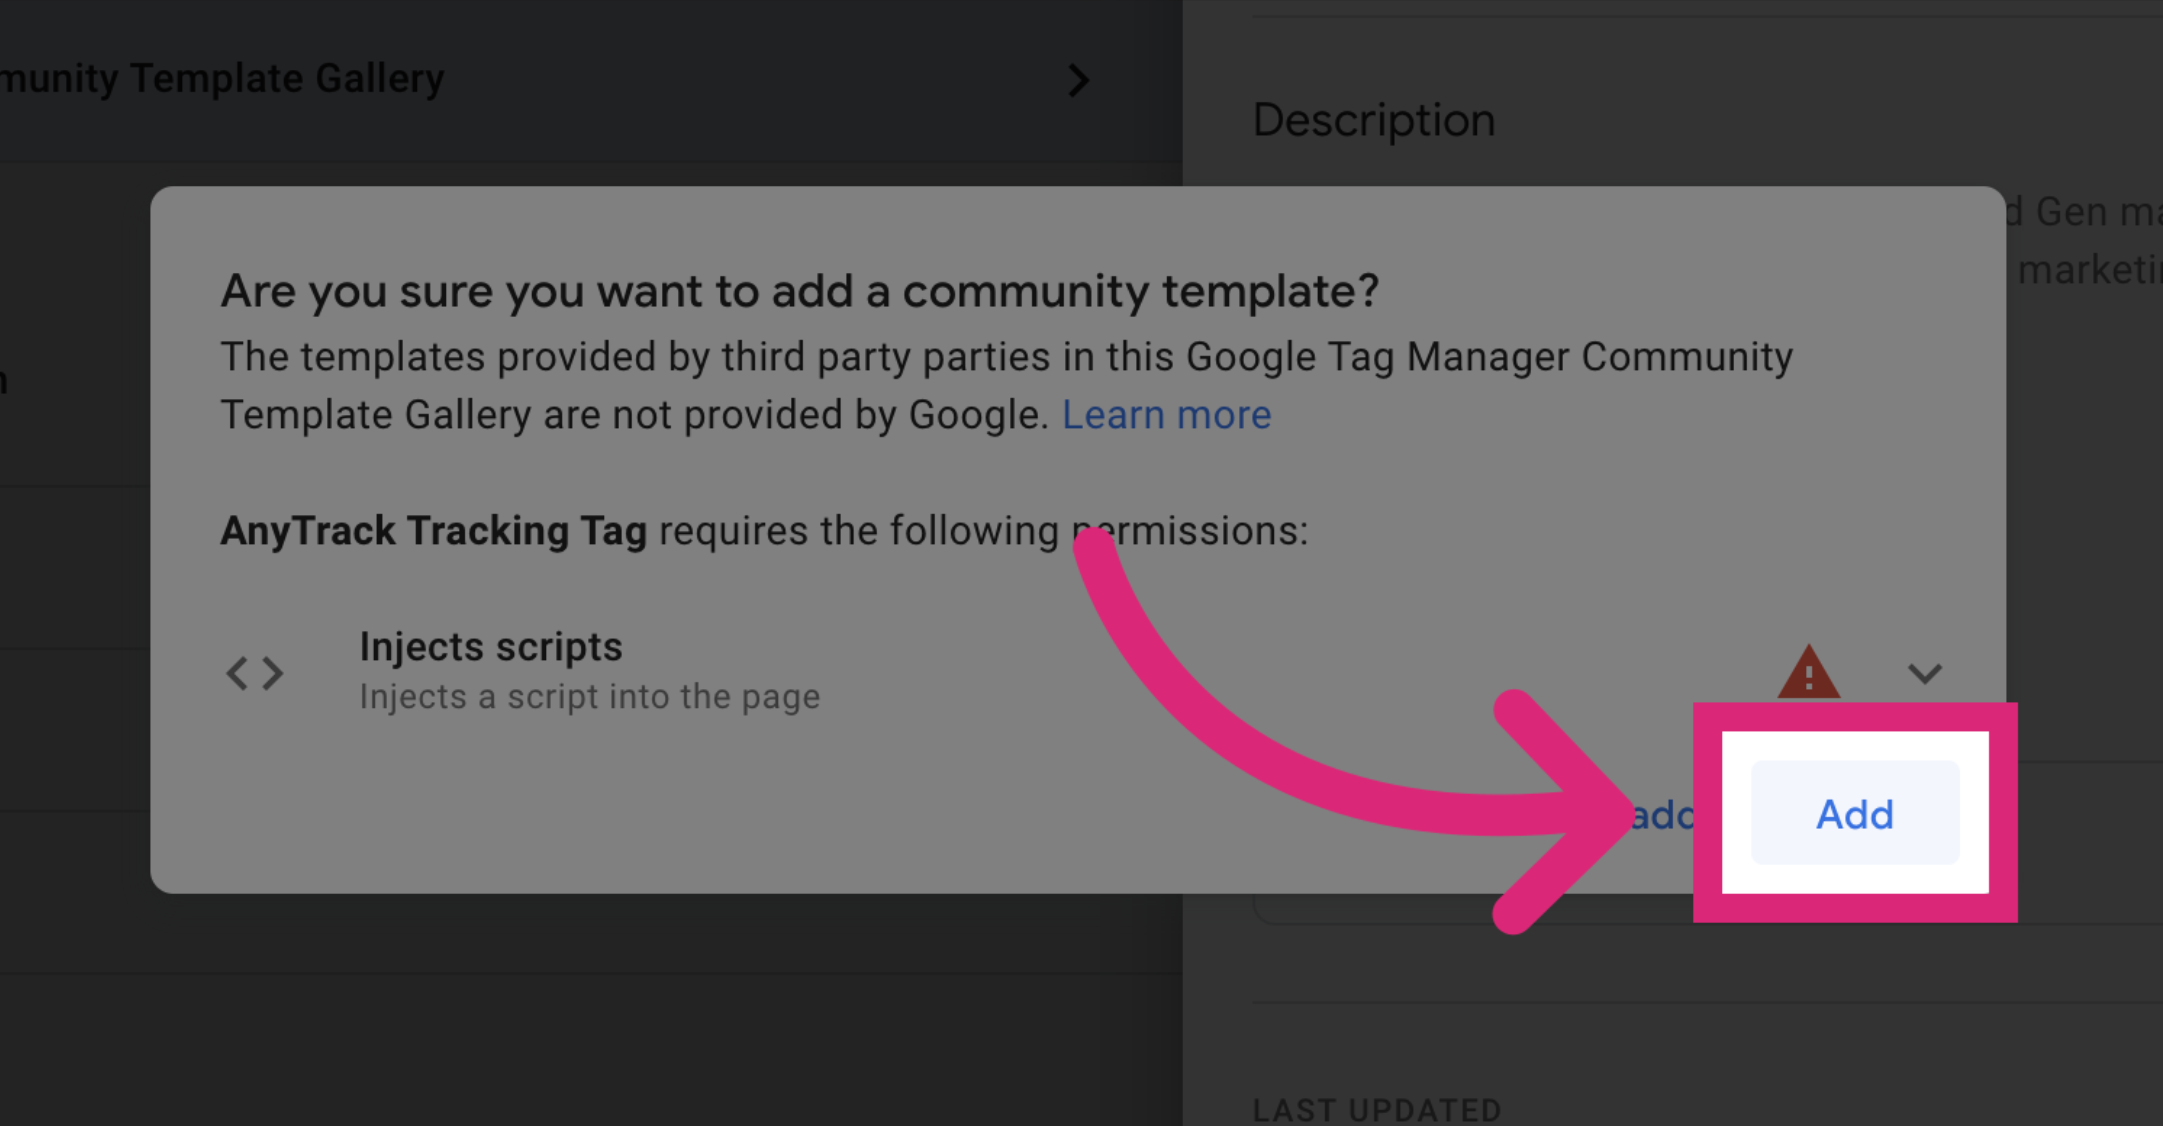
Click on the “Add” Button
Section titled “Click on the “Add” Button”
By clicking on the Add button you confirm your selection.
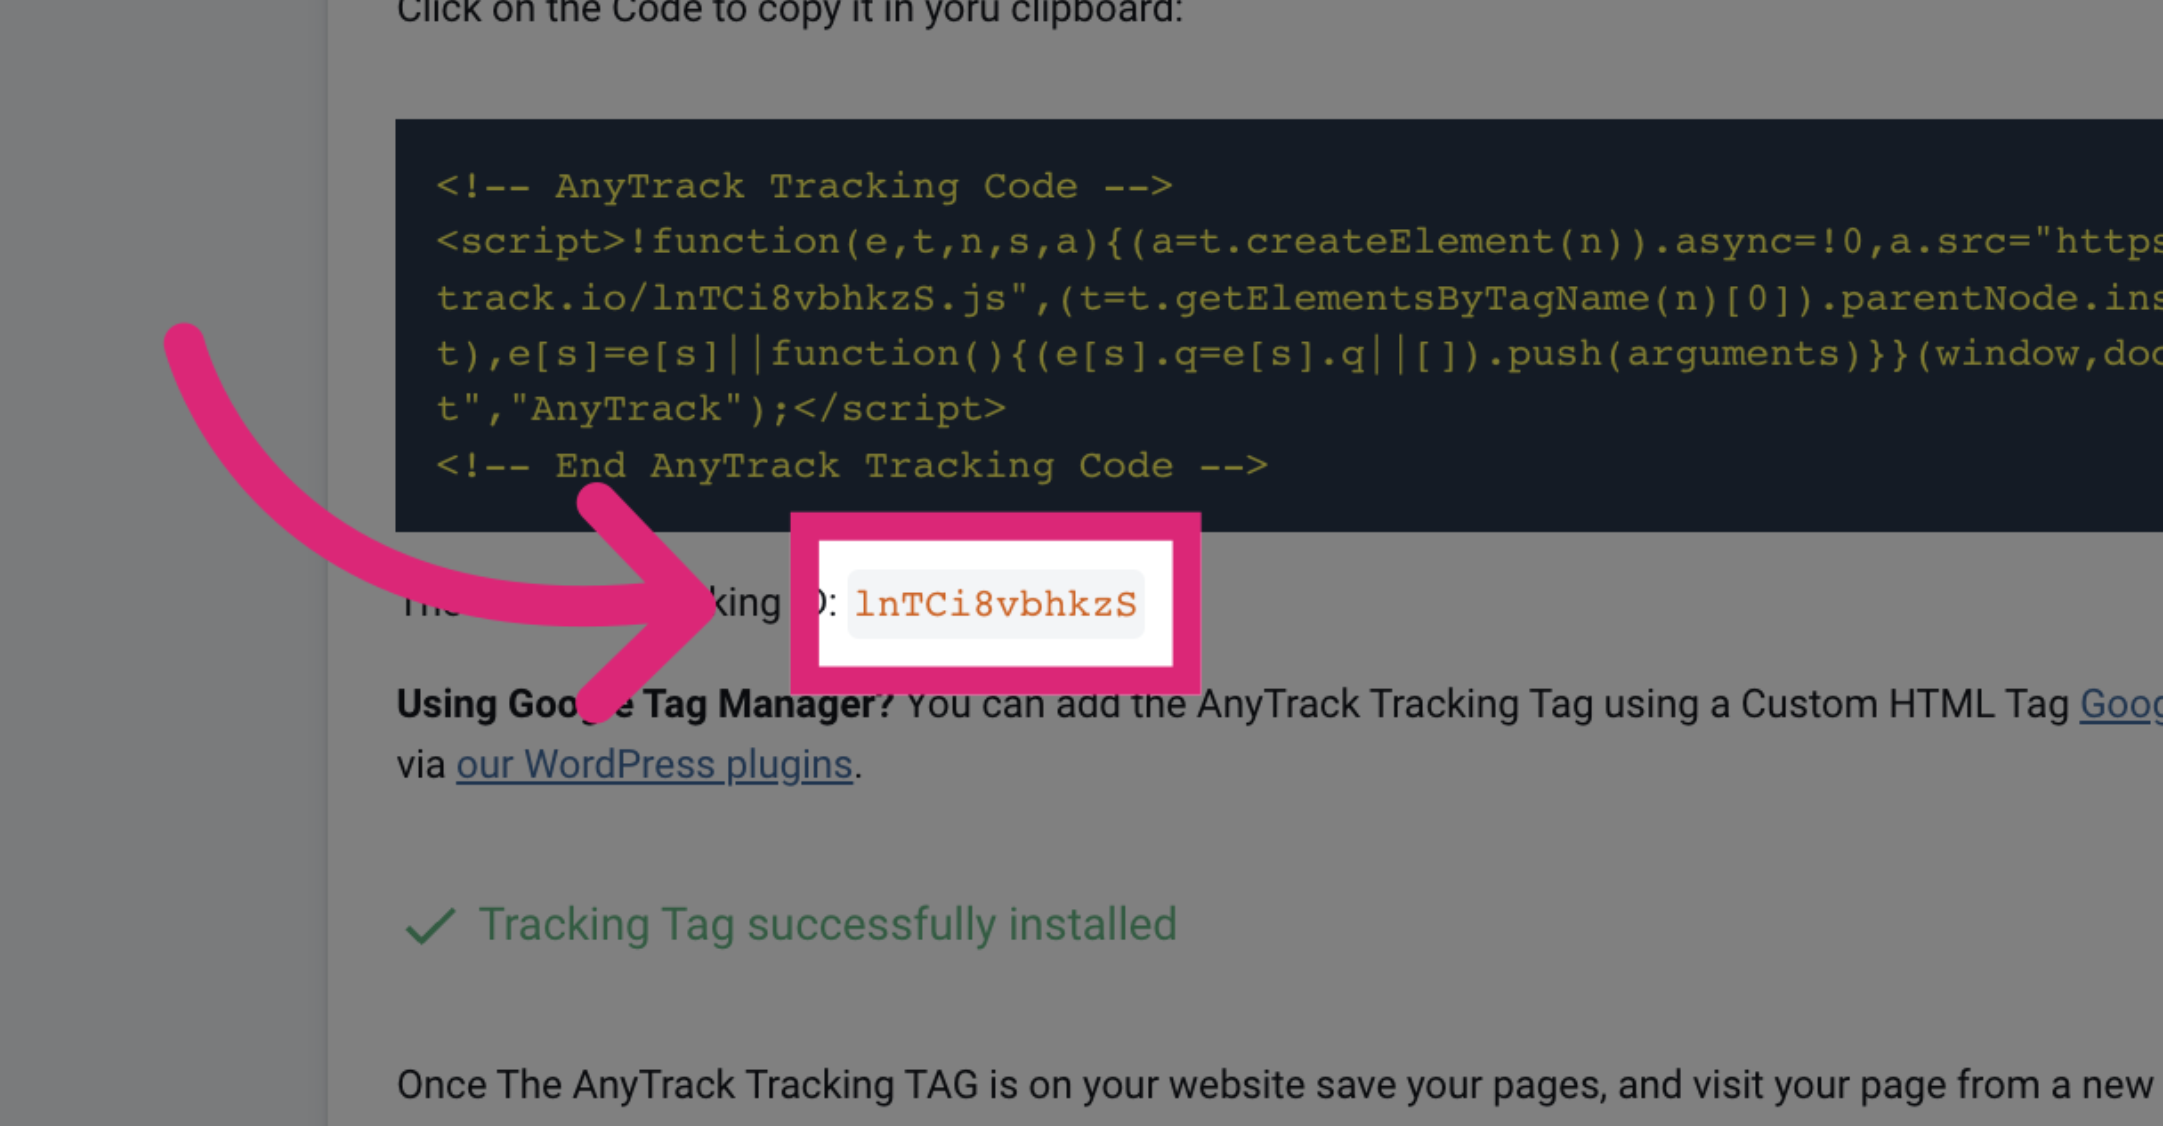
-
Locate the property ID and copy it to your clipboard (ctrl+c)
Switch to AnyTrack Property Settings
Section titled “Switch to AnyTrack Property Settings”
-
Switch to the AnyTrack Tag Configuration
Switch to Google Tag Manager
Section titled “Switch to Google Tag Manager”
-
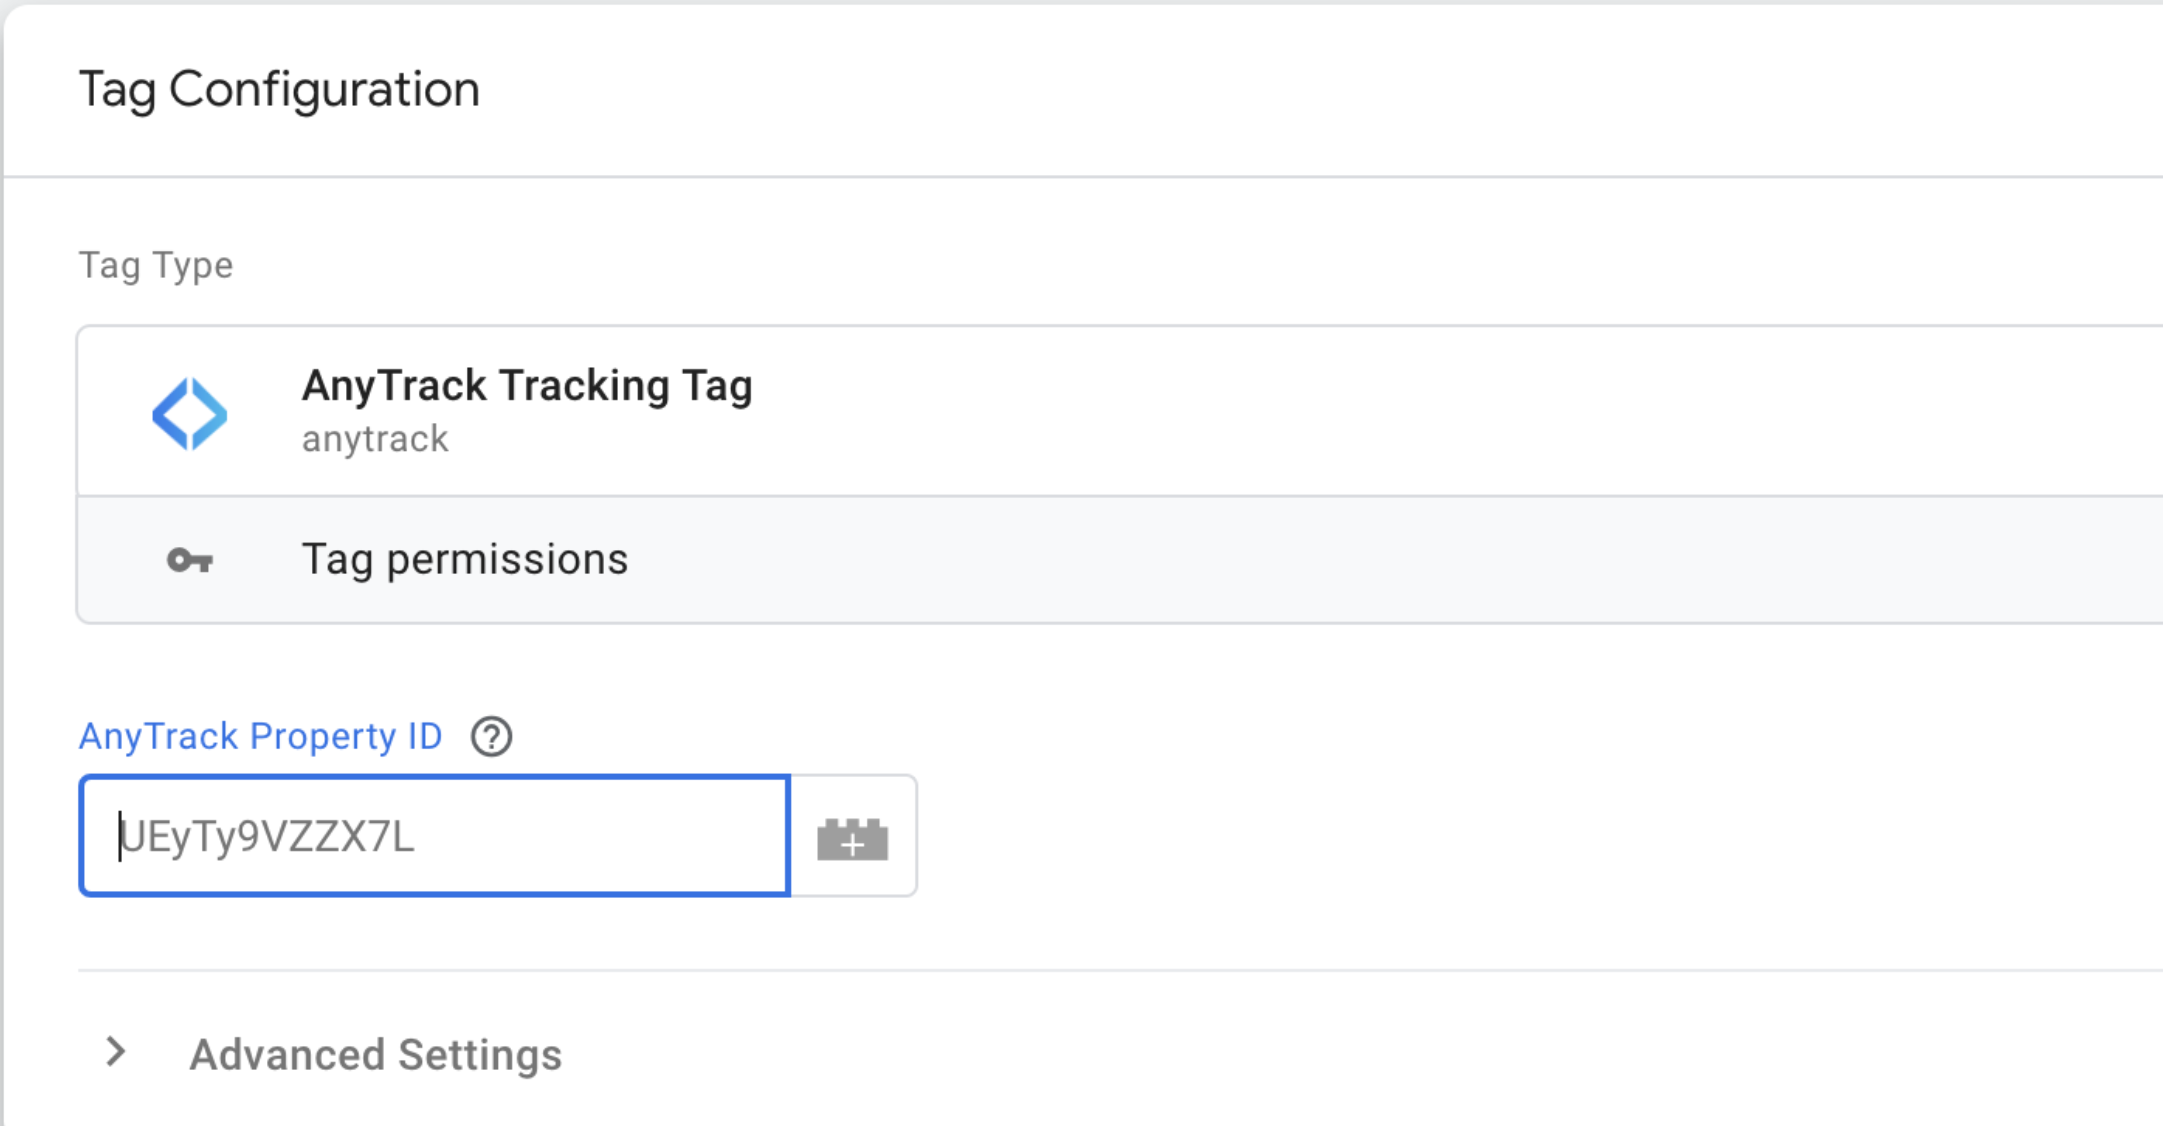
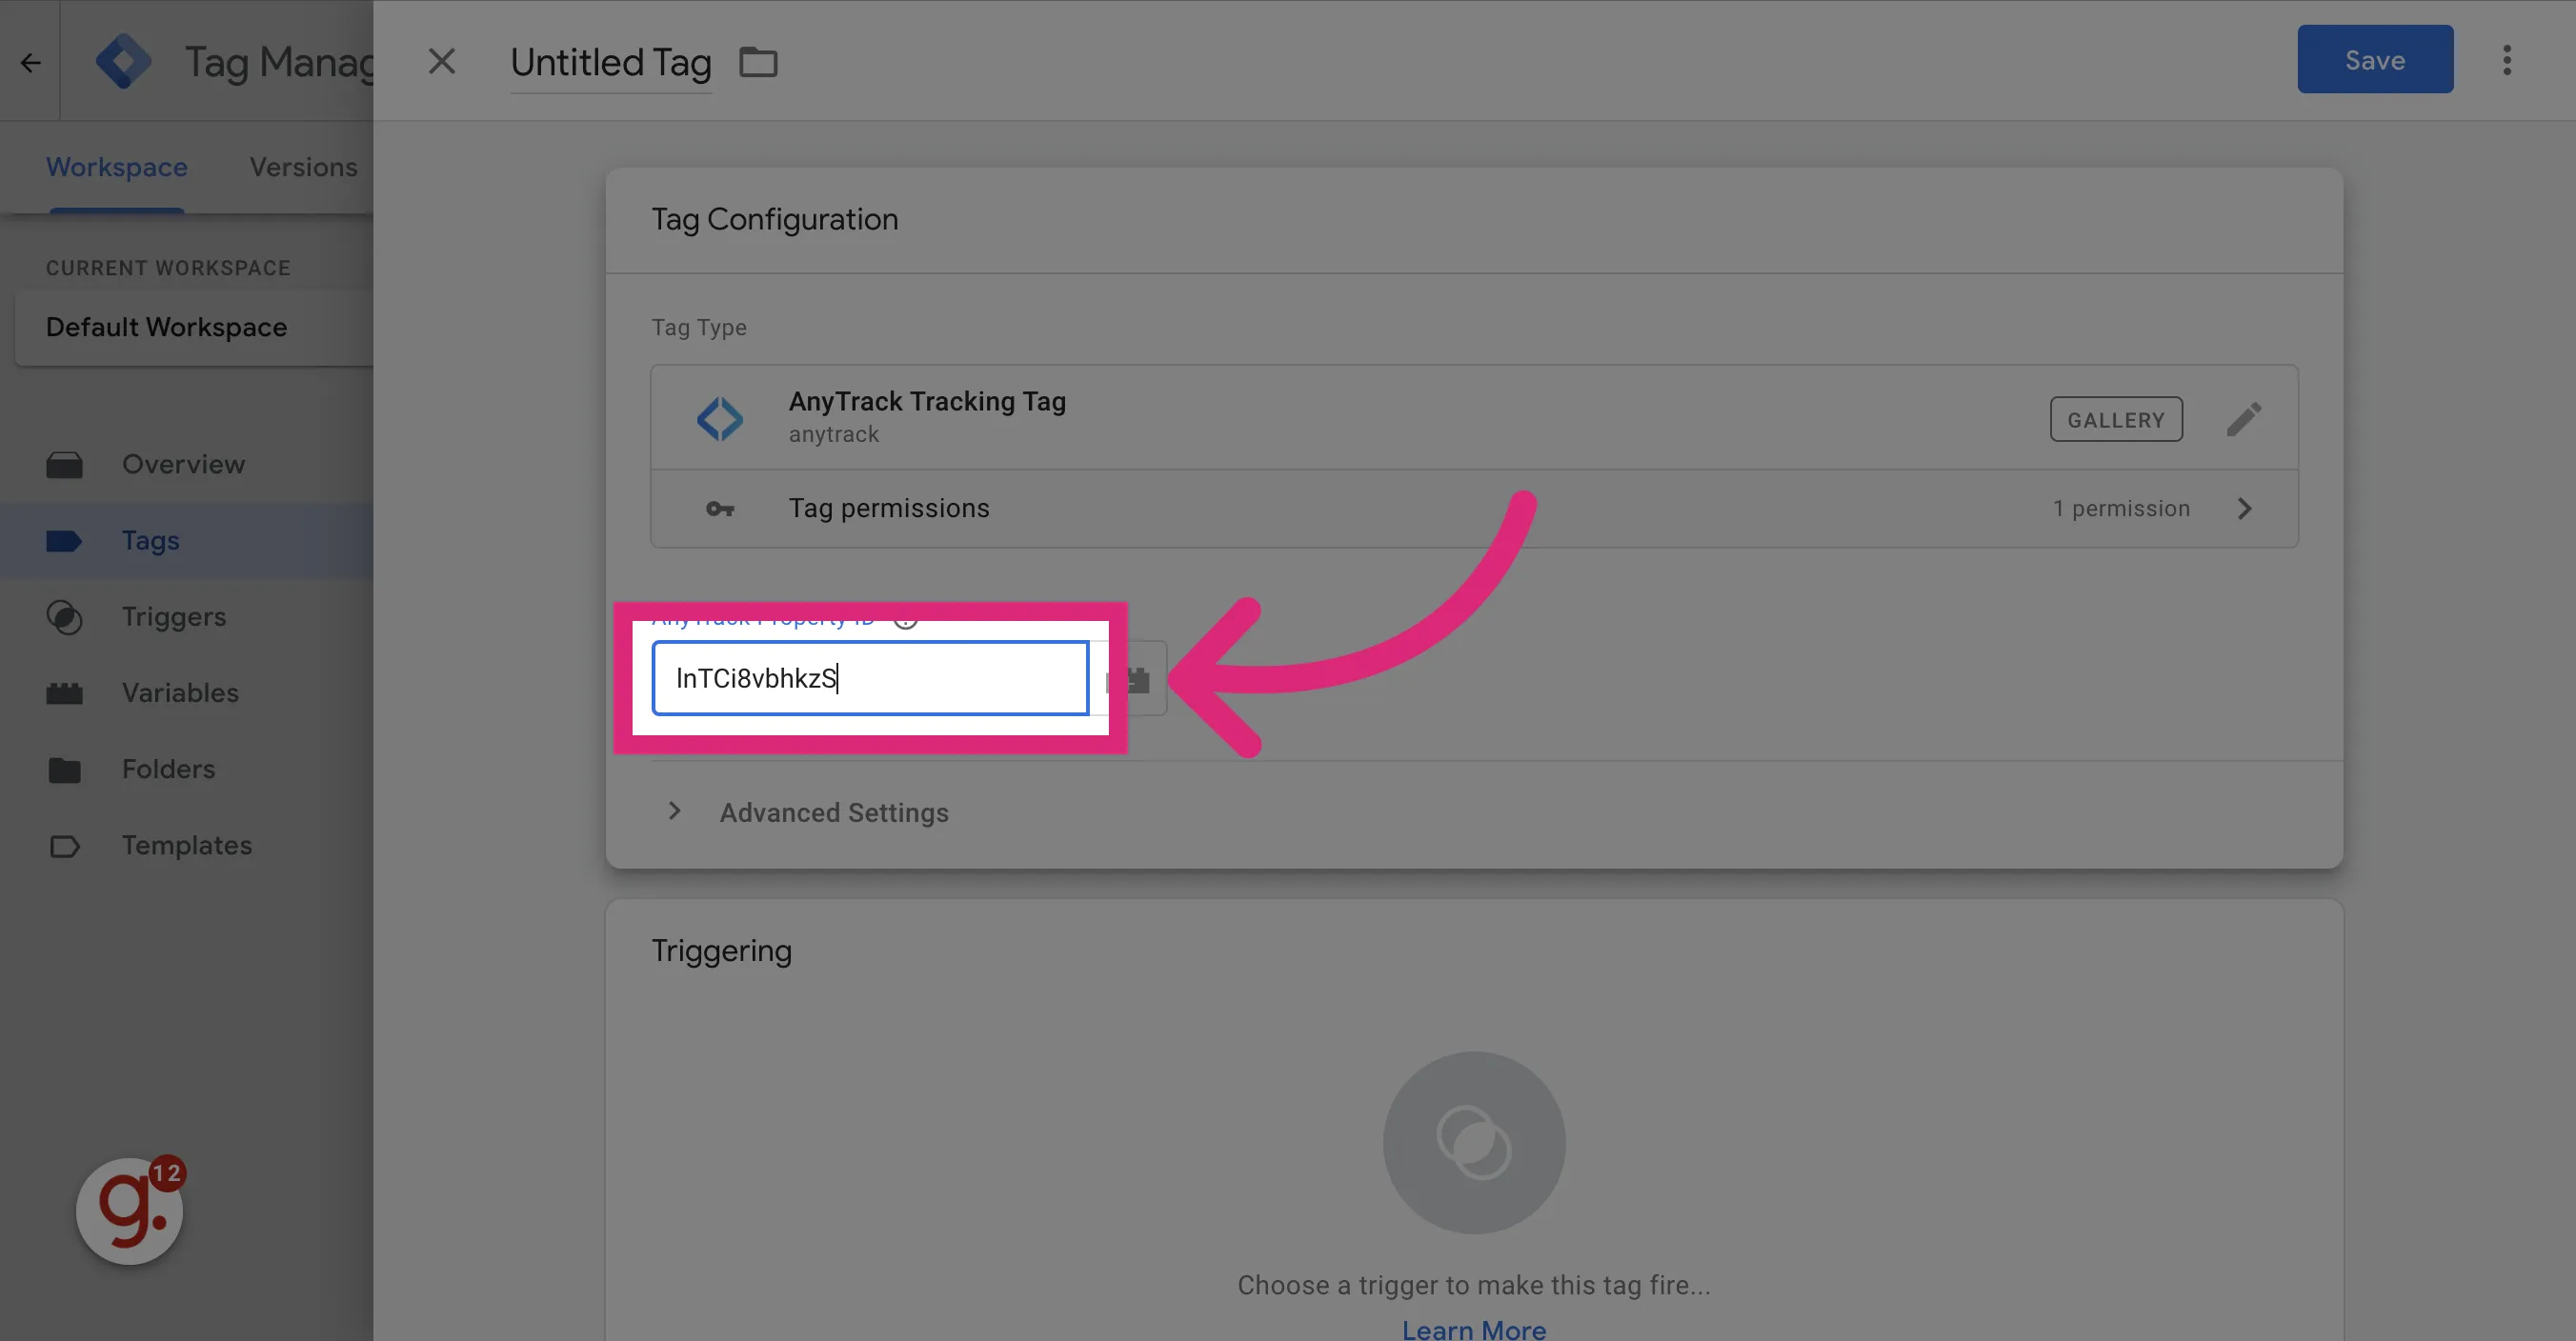
Now paste the Property ID in the selected field.
Now Paste the Property ID
Section titled “Now Paste the Property ID”
-
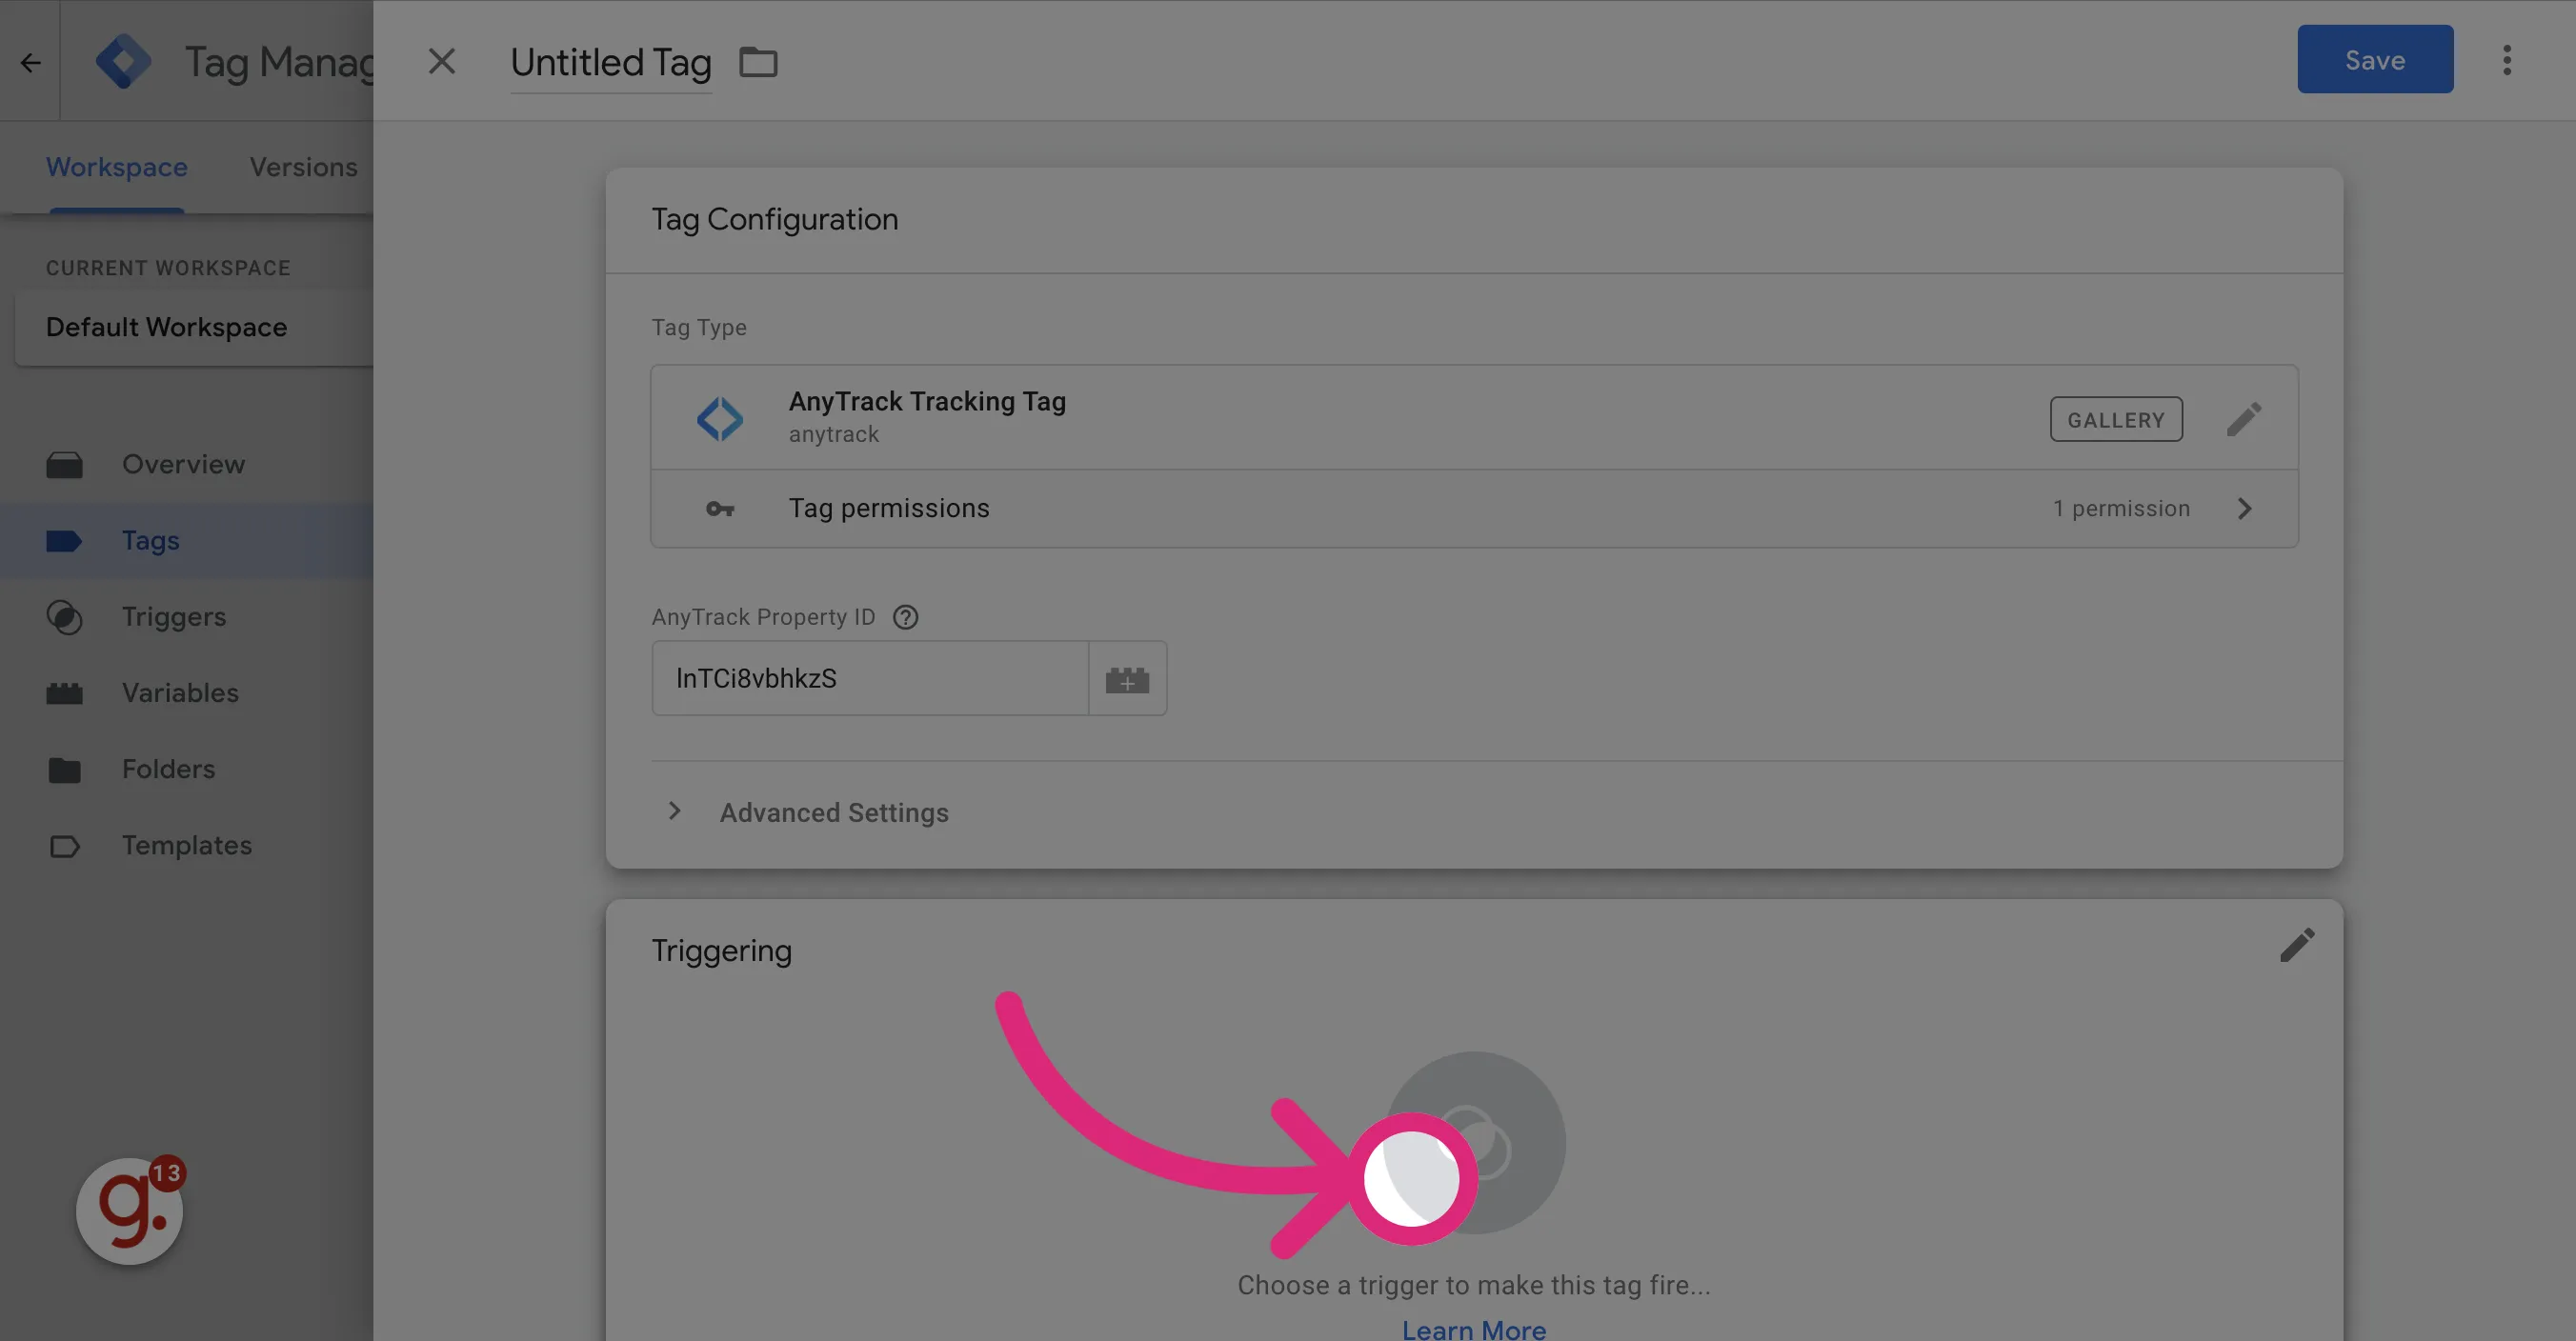
Now Click on Add Trigger configure the rule that will load the AnyTrack Tag.
Click on Add Trigger
Section titled “Click on Add Trigger”
-
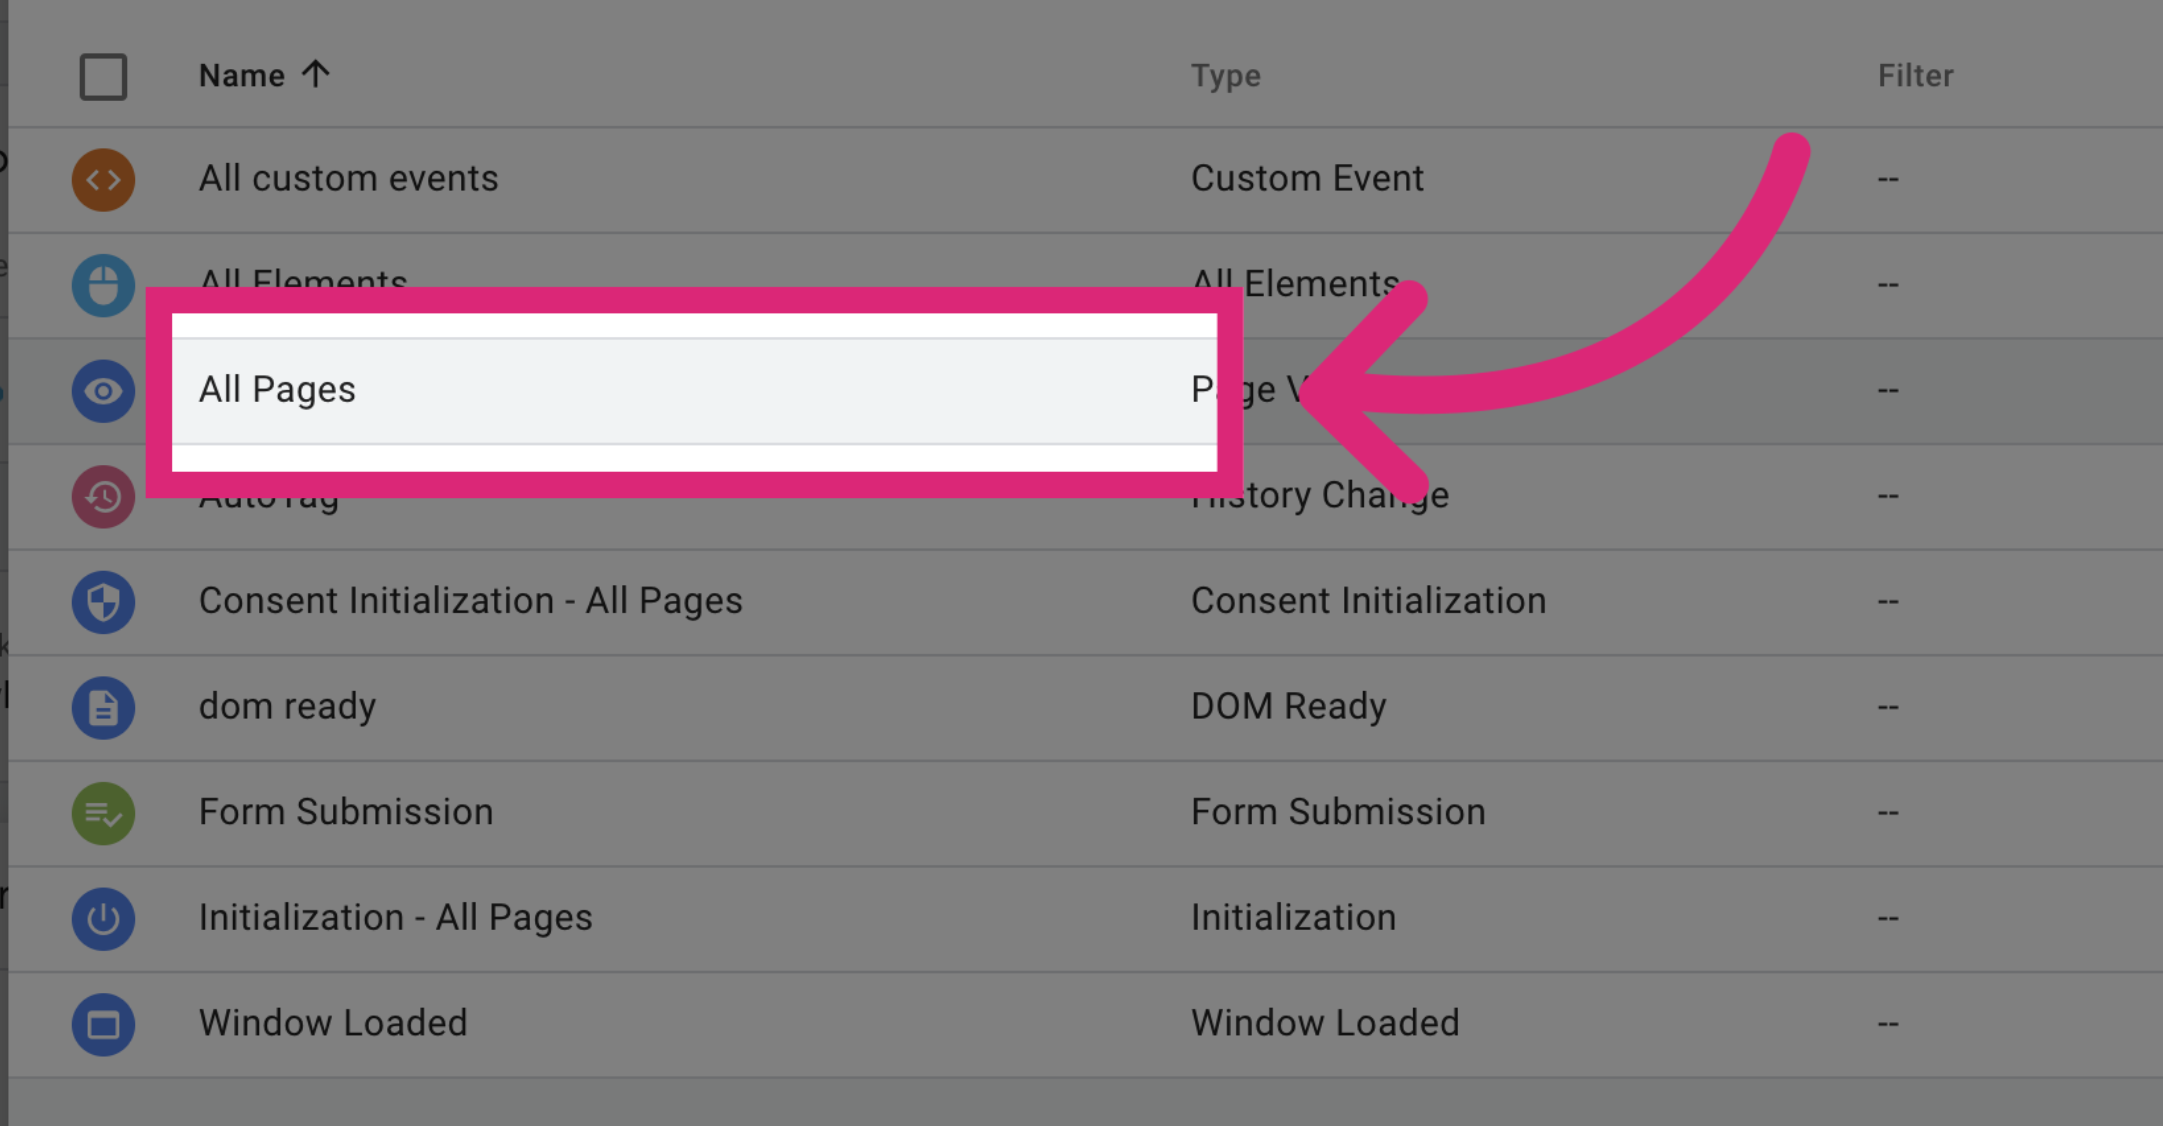
Select the “All Pages” option so that the AnyTrack Tag will load on every page where your container loads.
Select All Page Views
Section titled “Select All Page Views”
-
Save the Tag
Section titled “Save the Tag”
Now Save the AnyTrack Tag.

-
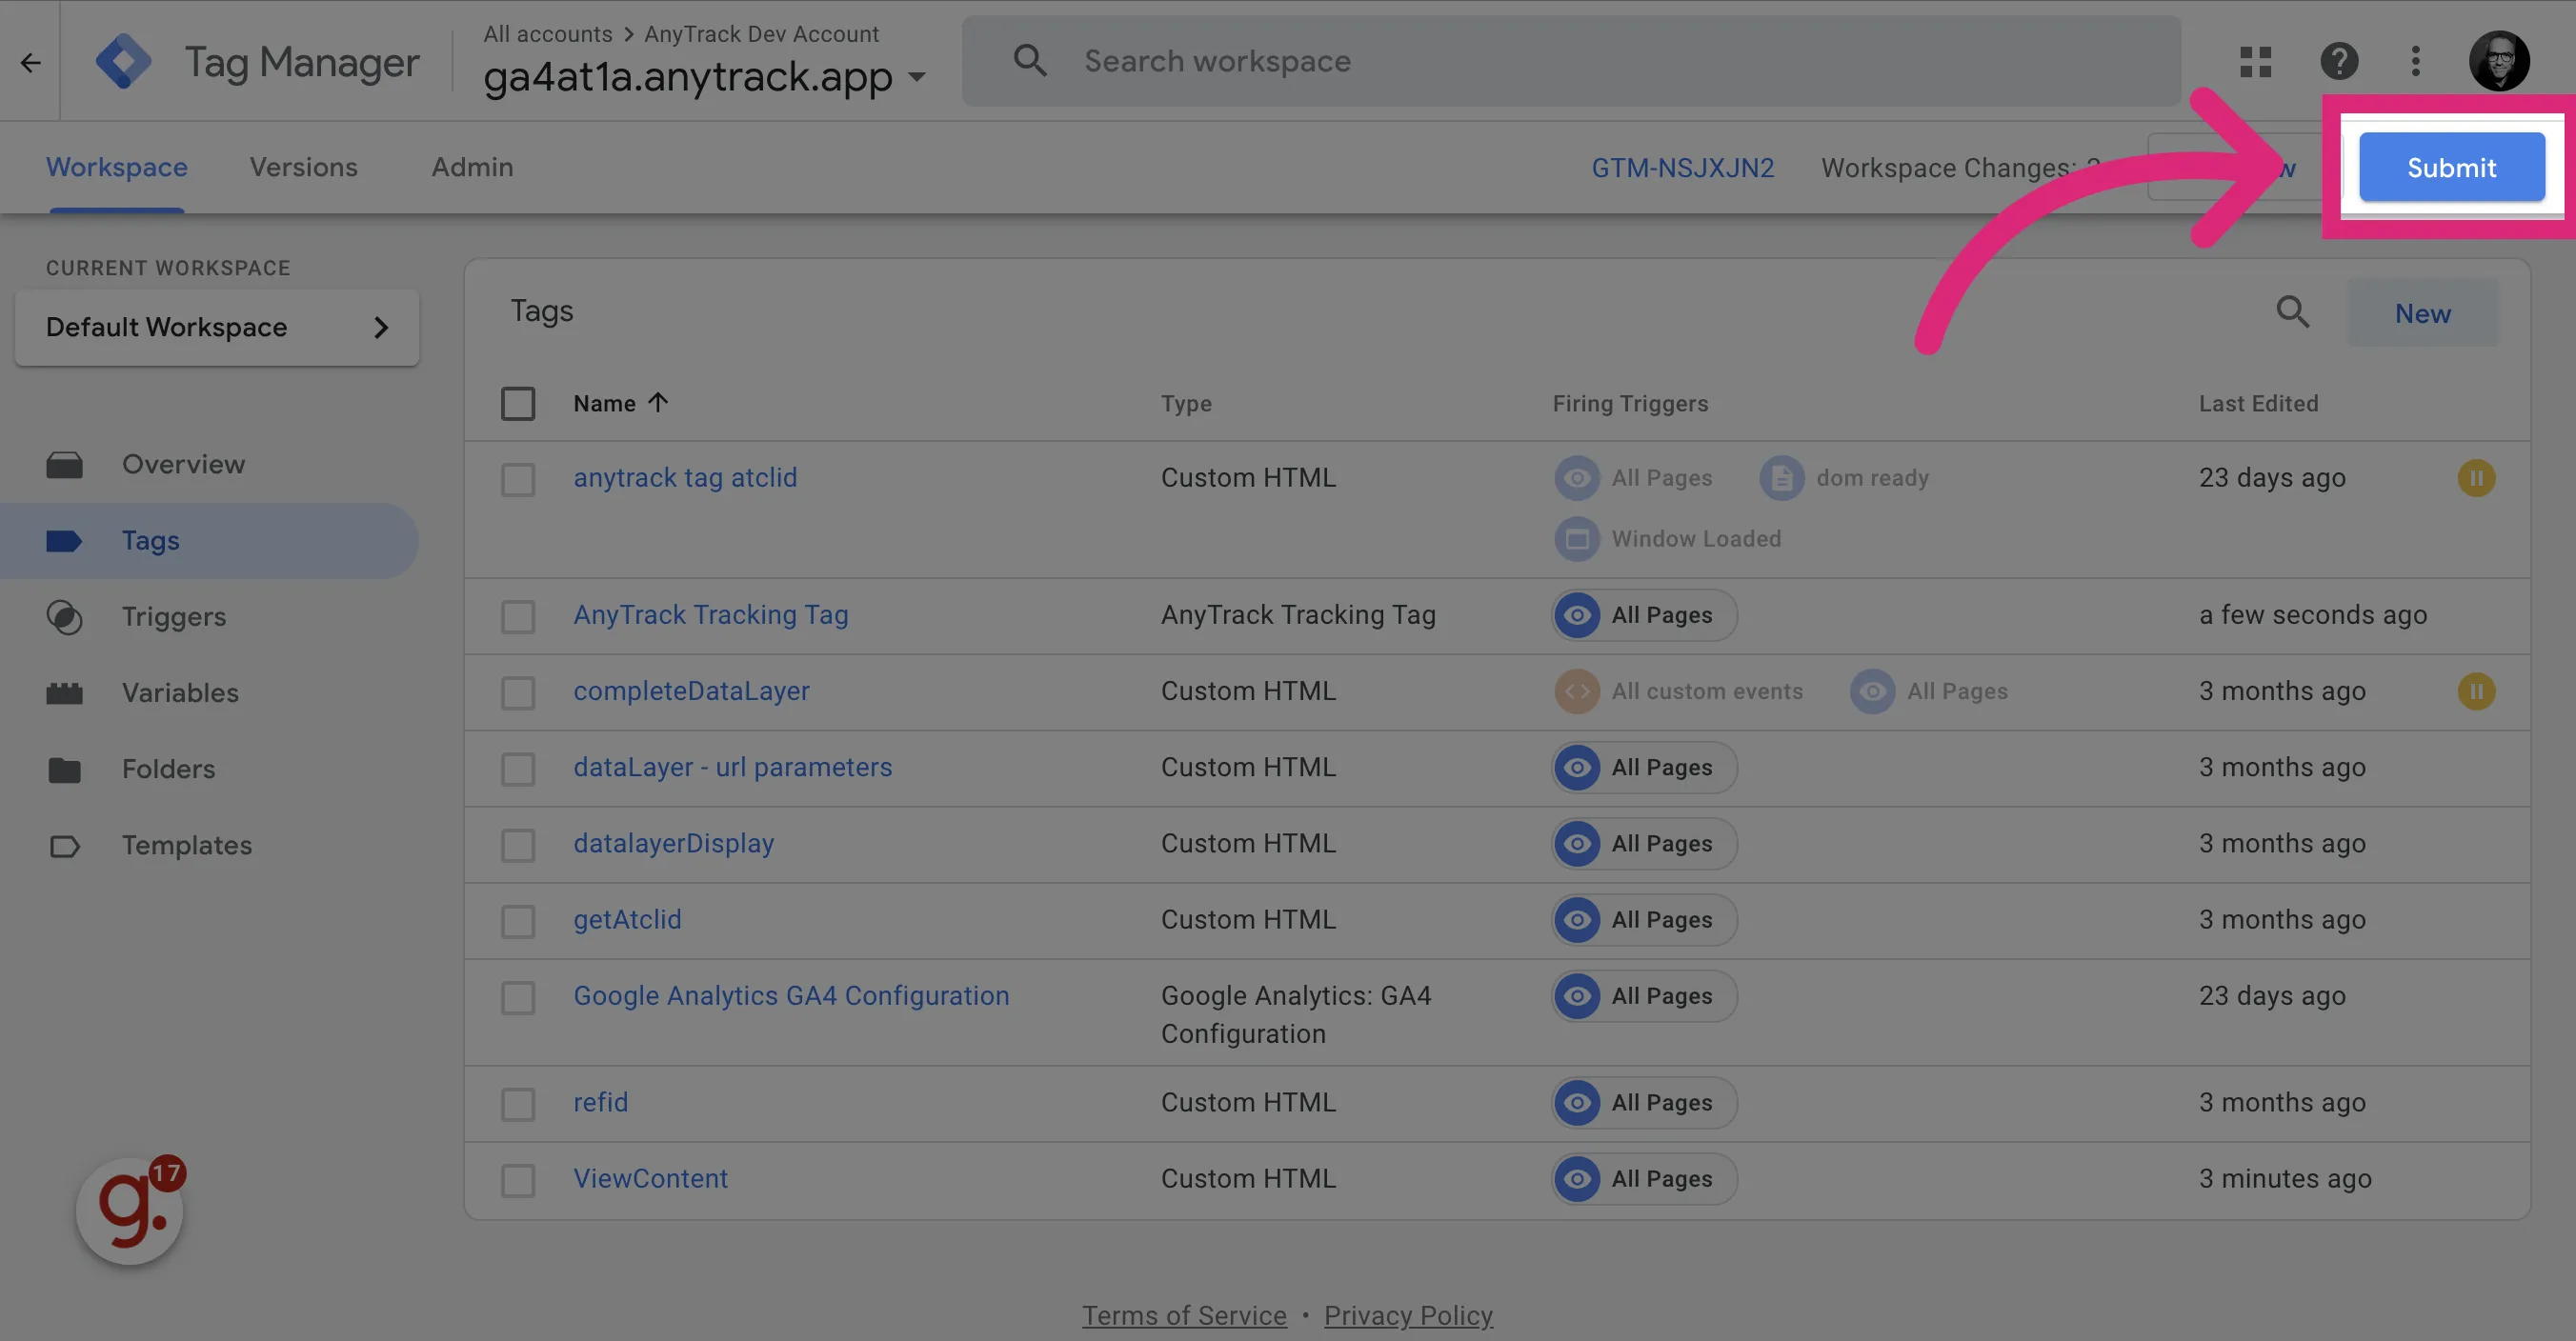
Submit your container
Section titled “Submit your container”
-
Click on the “Publish” button
Section titled “Click on the “Publish” button”

-
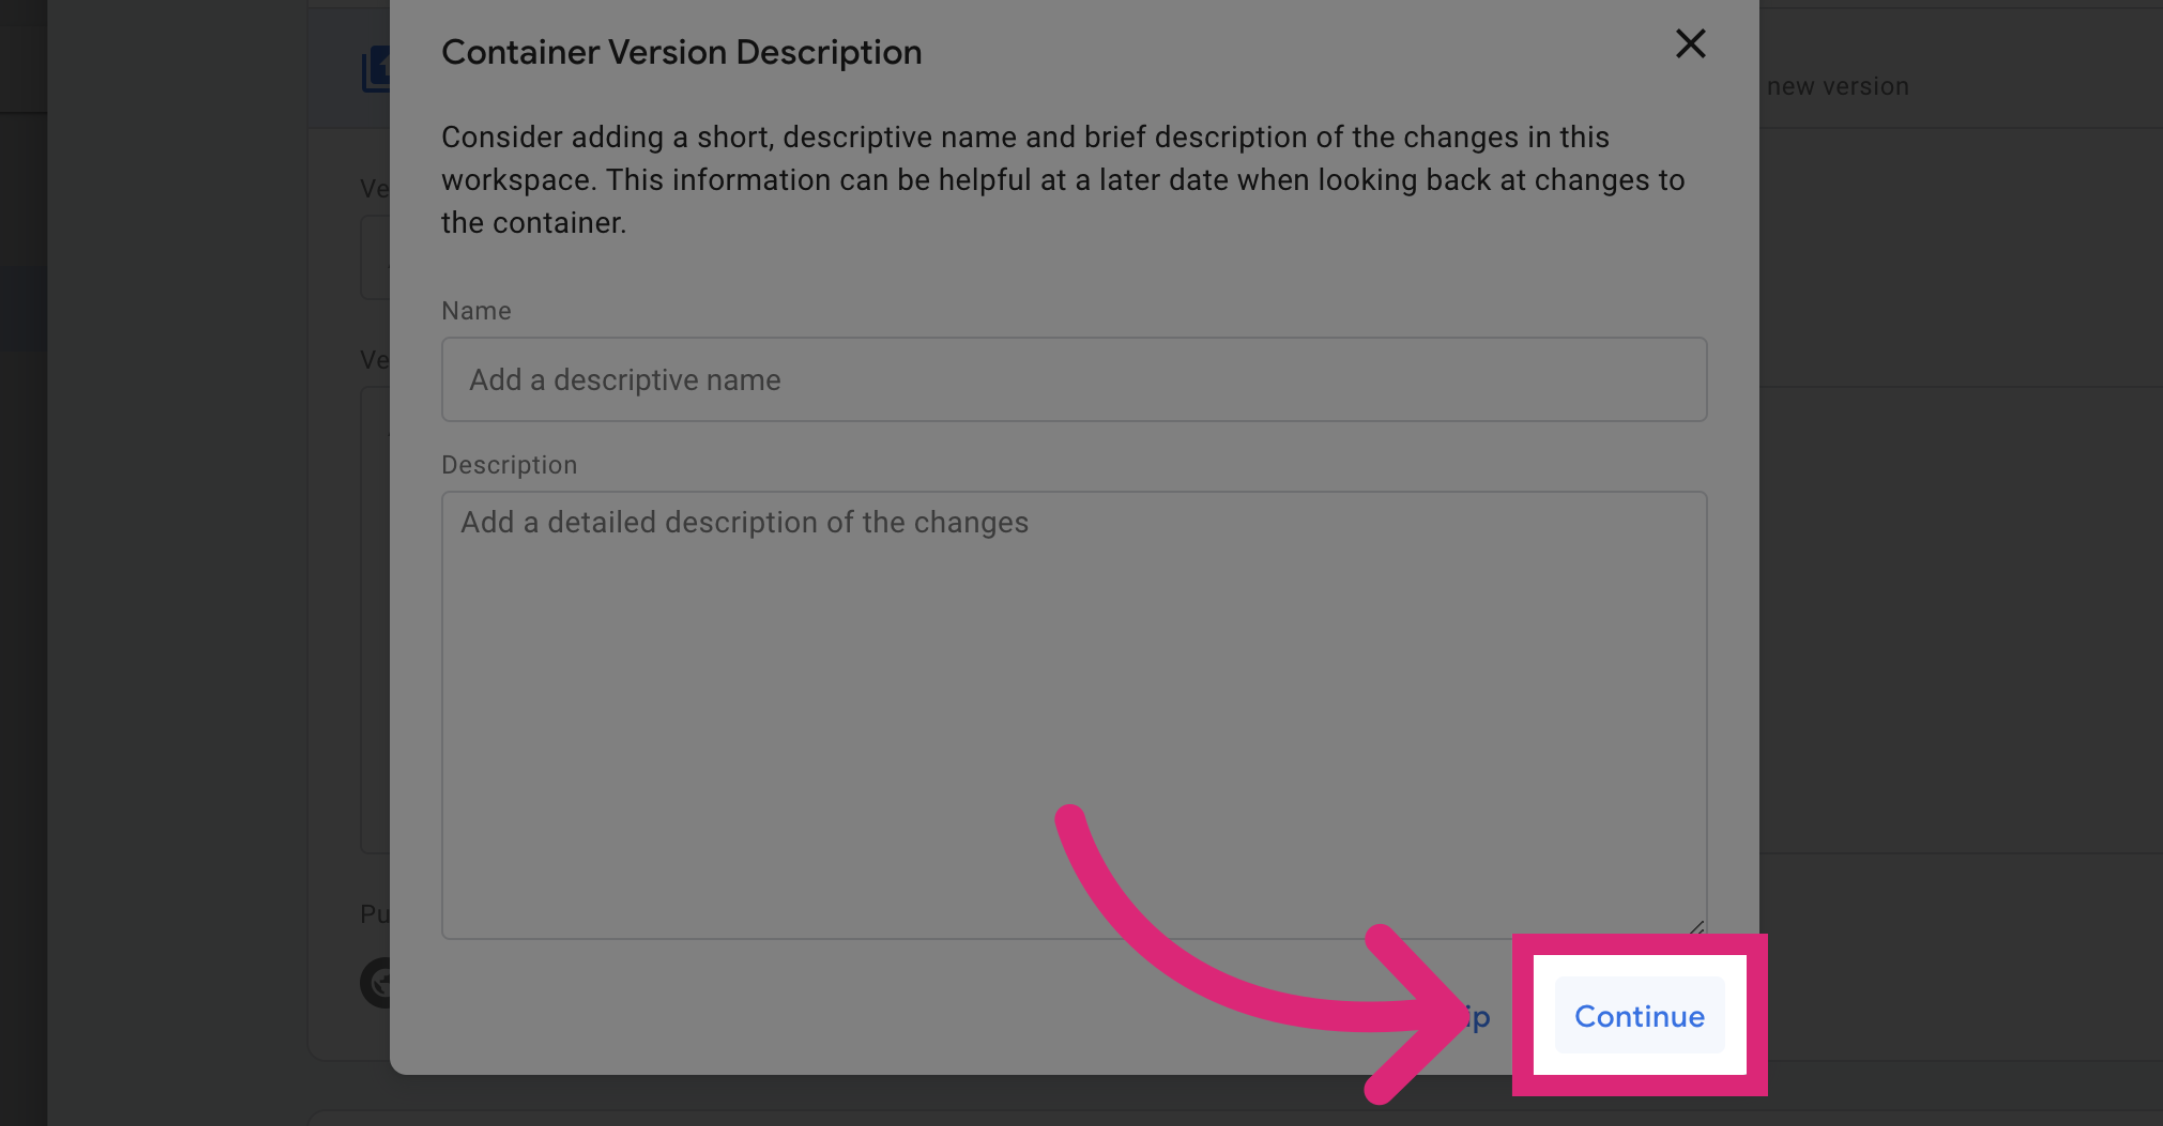
Update the Container version name and description if you wish to and Click on Continue.
Save the new Container Version
Section titled “Save the new Container Version”
Video Tutorial: Install AnyTrack Tag via GTM
Section titled “Video Tutorial: Install AnyTrack Tag via GTM”Watch this video for another detailed overview of how to install the AnyTrack Tag on your website using a Google Tag Manager container and trigger.
Trigger AnyTrack Events via GTM
Section titled “Trigger AnyTrack Events via GTM”If you use an eCommerce platform that is not natively integrated with AnyTrack but already pushes eCommerce events to the GTM dataLayer, you can use your existing GTM triggers to fire AnyTrack event snippets. This lets you send standard events like Purchase, AddToCart, or ViewContent to AnyTrack without writing any additional tracking code on your site.
When to Use This Approach
Section titled “When to Use This Approach”Use GTM to trigger AnyTrack events when your eCommerce platform already emits dataLayer events through GTM, but does not have a built-in AnyTrack integration. Common examples include:
- Shopware
- BigCommerce
- Adobe Commerce (Magento)
- PrestaShop
- Any platform with a GTM eCommerce
dataLayerimplementation
If AnyTrack already has a native integration for your platform (such as Shopify or WooCommerce), use that instead. Native integrations handle event tracking and attribution automatically.
How It Works
Section titled “How It Works”Your GTM container already has triggers that fire when eCommerce events occur (for example, when a purchase completes). You create a new Custom HTML tag that calls the AnyTrack event snippet, and attach it to those same triggers. AnyTrack receives the event with all the event attributes you pass, then sends the conversion data to your connected ad platforms.
Step 1: Set Up Tag Sequencing
Section titled “Step 1: Set Up Tag Sequencing”Tag sequencing tells GTM to fire the AnyTrack Tracking Tag before your event snippet tag. This is required because the event snippet depends on the AnyTrack() function that the Tracking Tag loads.
- Open the Custom HTML tag that will contain your AnyTrack event snippet (created in Step 2 below)
- Scroll down to Advanced Settings and expand Tag Sequencing
- Check “A tag that fires before [this tag]”
- Select your AnyTrack Tracking Tag from the dropdown
- Check “Don’t fire [this tag] if the setup tag fails or is paused”
This ensures the Tracking Tag is fully loaded before the event snippet runs.
Step 2: Create the Event Snippet Tag
Section titled “Step 2: Create the Event Snippet Tag”Create a new Custom HTML tag in GTM that calls the AnyTrack event snippet. Use the standard event names that AnyTrack supports, such as Purchase, AddToCart, InitiateCheckout, or ViewContent.
Map your existing GTM dataLayer variables to AnyTrack event attributes using GTM variable references ({{variable_name}}).
Example: Purchase Event
<script> AnyTrack('trigger', 'Purchase', { value: {{dlv - transaction total}}, currency: {{dlv - currency}}, transactionId: {{dlv - transaction id}}, email: {{dlv - customer email}}, items: {{dlv - items array}} });</script>Replace the {{dlv - ...}} placeholders with the actual GTM variable names from your dataLayer configuration. For example, if your platform pushes the total purchase value to a variable called ecommerce.purchase.value, create a Data Layer Variable in GTM for that path and reference it here.
Example: AddToCart Event
<script> AnyTrack('trigger', 'AddToCart', { items: {{dlv - items array}}, value: {{dlv - item value}}, currency: {{dlv - currency}} });</script>Example: ViewContent Event
<script> AnyTrack('trigger', 'ViewContent', { items: {{dlv - items array}} });</script>Step 3: Attach Your Existing Triggers
Section titled “Step 3: Attach Your Existing Triggers”Attach the same triggers you already use for your eCommerce tracking. For example, if you have a trigger that fires on the purchase dataLayer event, use that same trigger for your AnyTrack Purchase event snippet tag.
There is no need to create new triggers. The triggers you already have in your GTM container for events like purchase, add_to_cart, or view_item work with the AnyTrack event snippet tags.
Step 4: Test and Publish
Section titled “Step 4: Test and Publish”- Open GTM Preview mode and complete a test transaction on your site
- Verify in the GTM debugger that the AnyTrack Tracking Tag fires before the event snippet tag
- Check the Conversion Report in your dashboard for the incoming event
- Install the AnyTrack Pixel Helper Chrome extension to confirm events fire in the browser
- Once verified, Submit and Publish your GTM container
Supported Standard Events
Section titled “Supported Standard Events”You can trigger any standard event through GTM. The most common eCommerce events are:
| Event Name | When to Trigger | Required Attributes |
|---|---|---|
ViewContent | Product page view | items (with product id and price) |
AddToCart | Item added to cart | items, value, currency |
InitiateCheckout | Checkout started | items, value, currency |
Purchase | Order completed | value, currency, transactionId, items |
For the full list of supported event attributes, including customer data (email, name, phone) and product data (id, name, price, quantity), see the Event Attributes documentation.
GTM Tips and Tricks
Section titled “GTM Tips and Tricks”Retrieve the atclid and Push It to the dataLayer
Section titled “Retrieve the atclid and Push It to the dataLayer”Use this snippet to collect the AnyTrack click ID and make it available as a GTM variable. You can then use it to decorate forms, links, or pass it to other tags.
<script>(function checkAtclid(attempts) { if (typeof AnyTrack === 'function' && typeof AnyTrack.q === 'undefined') { window.dataLayer = window.dataLayer || []; window.dataLayer.push({ event: 'atclid_ready', atclid: AnyTrack('atclid') }); } else if (attempts < 50) { setTimeout(function() { checkAtclid(attempts + 1); }, 100); }})(0);</script>Validation
Section titled “Validation”FAQ and Troubleshooting
FAQ was last reviewed on 2026-07-18