Shopify Advanced
Set up Shopify Advanced conversion tracking with AnyTrack to track purchases, cart events, and revenue. Connect your store data to ad platforms for accurate attribution and ROAS optimization.
Client-Side Tracking Settings
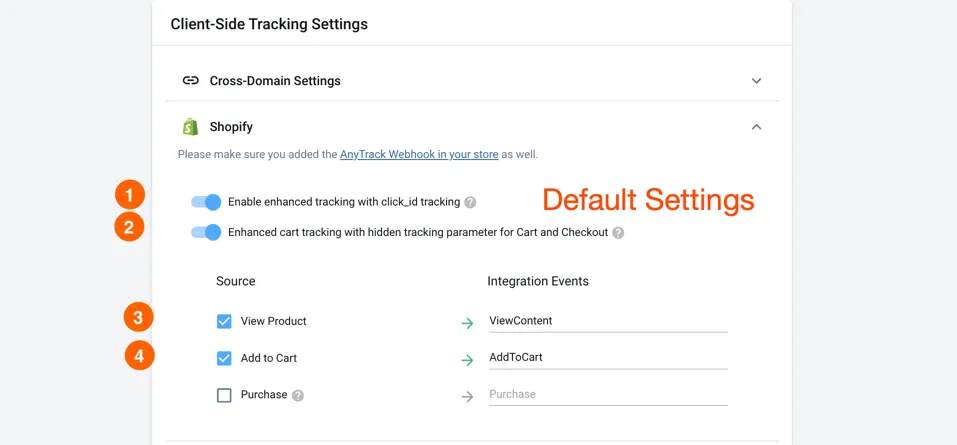
Section titled “Client-Side Tracking Settings”When enabling client-side tracking you gain more control over the checkout data collection which lets you enrich your Tracking Tag via the server-side integration.
- URL parameter: This allows AnyTrack to pass and read unique tracking parameters through your funnel.
- Hidden parameters: AnyTrack passes a unique tracking parameter into the cart’s standard hidden fields. This option guarantees maximum tracking accuracy.
Client-Side Tracking Events
Section titled “Client-Side Tracking Events”- AnyTrack uses client-side tracking events to collect product data.
- AnyTrack deduplicates these events with the server-side events.
- AnyTrack then sends the events through the Conversion API of your ads integrations.
Troubleshooting
Section titled “Troubleshooting”Tracking Not Working After Changing Shopify Theme
Section titled “Tracking Not Working After Changing Shopify Theme”When you switch, change, or reinstall your Shopify theme, the theme code is rewritten, which removes the AnyTrack Tracking Tag. You can easily restore tracking by following these steps:
Reinstall the AnyTrack Tag
Section titled “Reinstall the AnyTrack Tag”-
From your AnyTrack dashboard, navigate to the Property Settings section for your Shopify store and select the ‘Tracking Script’ tab.
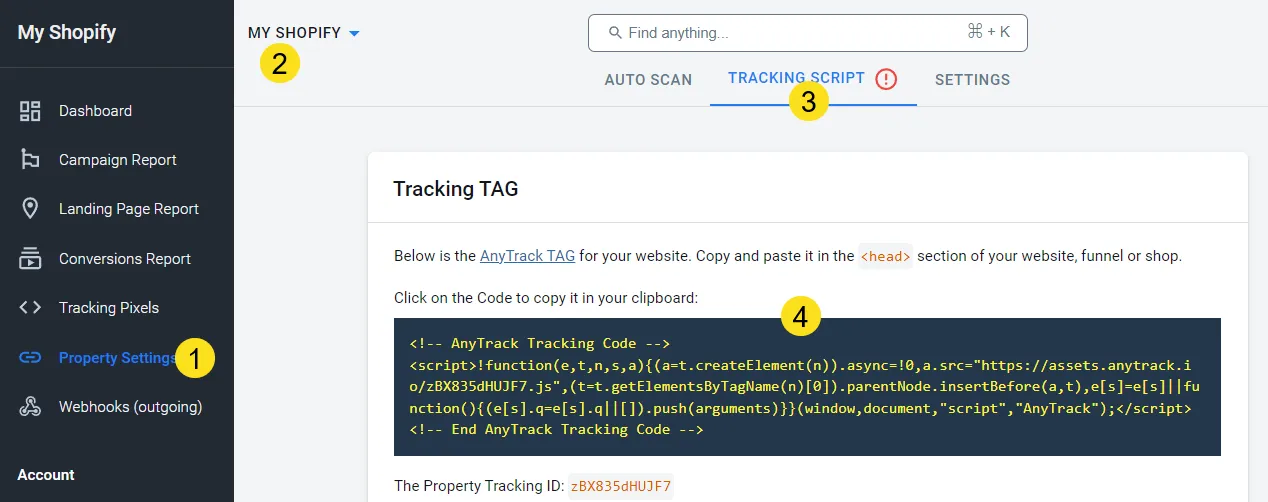
Find the AnyTrack Tag in the Property Settings Section -
Click on the tag to copy it to your clipboard.
-
From your Shopify dashboard, navigate to ‘Online Store’, click on the three dots button, and select ‘Edit Code’.
-
In the ‘Layout’ folder, select the ‘theme.liquid’ file.
-
Paste the AnyTrack Tracking Tag before the closing
</head>tag. -
Save your changes.
Validation
Section titled “Validation”Use the AnyTrack Pixel Helper Chrome extension to verify if the AnyTrack Tracking Tag is now correctly detected on your Shopify store.
Shopify Advanced - Frequently Asked Questions
FAQ was last reviewed on 2026-07-12