
Advanced Options
Set up WooCommerce advanced conversion tracking with AnyTrack. Use client-side tracking as a fallback when the AnyTrack plugin cannot be deployed, and map Purchase events for accurate attribution.
Client-Side Tracking Settings for WooCommerce
Before you begin
- You have an AnyTrack account with a paid subscription
- You have a WooCommerce store connected to AnyTrack
- The AnyTrack Tracking Tag is installed on your website
If you're not using the AnyTrack Plugin for WooCommerce, which you should, you can activate client-side tracking for Purchase events and map them as if they were native AnyTrack integration events. However, this feature should only be used if deploying the plugin is not feasible. Using the plugin is strongly recommended as it allows you to track additional WooCommerce events, not just purchases.
WarningOnly activate client-side tracking as a fallback when the AnyTrack Plugin for WooCommerce cannot be deployed.
To configure client-side tracking:
- Open the AnyTrack Dashboard and go to Property Settings
- Select your WooCommerce site using the property selector
- Go to the Settings tab
- Scroll down to Client-Side Tracking Settings
- Select WooCommerce
- Choose the Purchase event and map it to a conversion
- Click Save
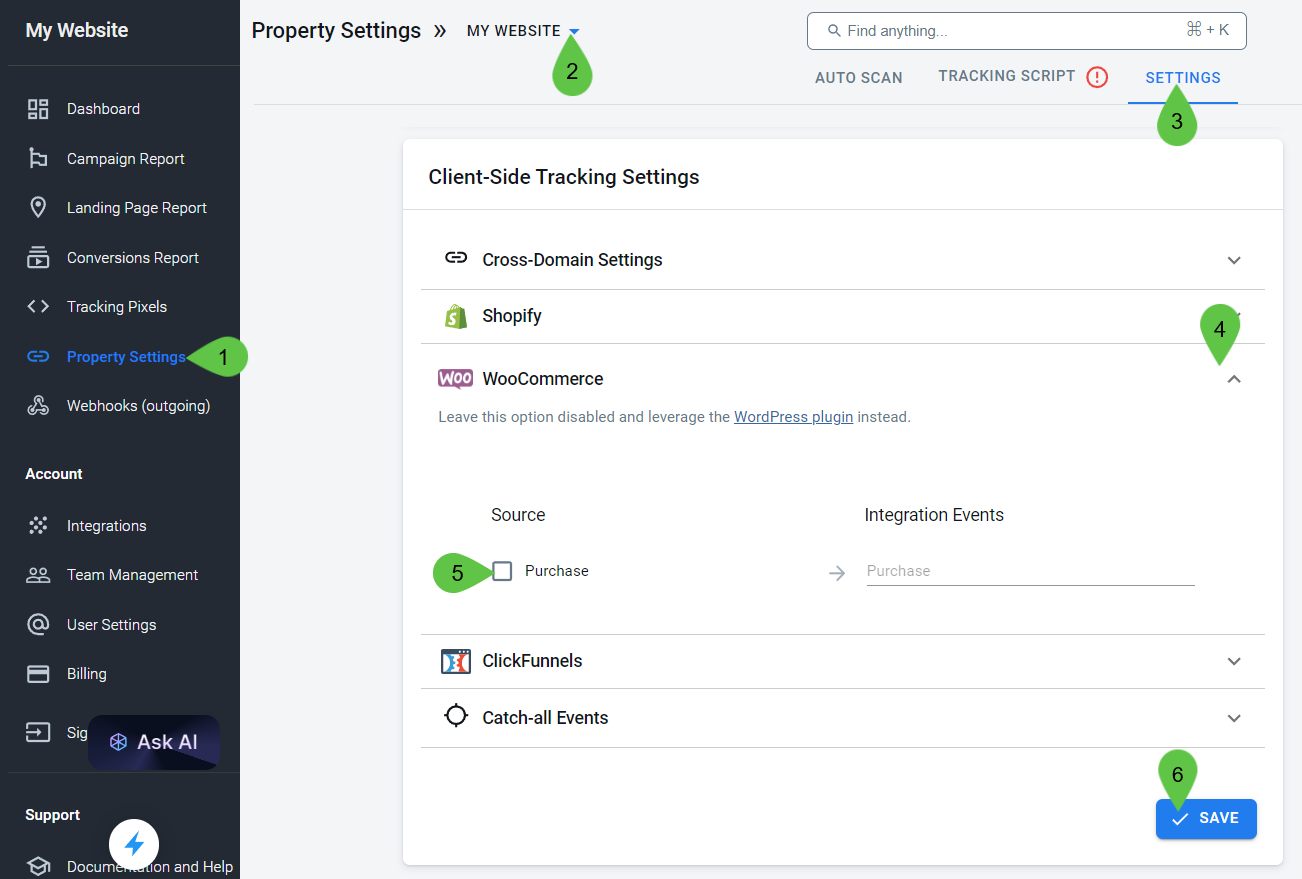
Client-side tracking options for WooCommerce can be found in the Settings tab of the Property Settings section.
What client-side tracking covers
Client-side tracking for WooCommerce only captures Purchase events. It does not track earlier funnel steps like ViewContent, AddToCart, or InitiateCheckout. For full funnel coverage, use the AnyTrack Plugin for WooCommerce instead.
NoteClient-side tracking relies on the Tracking Tag being installed on your site. Make sure the tag is firing correctly before testing Purchase events.
Advanced WooCommerce Tracking FAQ
FAQ was last reviewed on 2026-05-22
Updated 4 days ago